Bill Tarant was not an archaeologist. When in the spring of 2008 he received a call from Felix Golubev, the producer of the James Cameron/Simcha Jacabovici documentary “The Lost Tomb of Jesus”, he knew it wasn’t a call for his archaeological insights. It was about plans to make a second documentary, this time about another tomb located just a short distance from the now famous and somewhat controversial Talpiot Tomb, the subject of the “Lost Tomb of Jesus” documentary. This other tomb, known as the ‘Talpiot B’ Tomb, or more popularly as the ‘Patio Tomb’ because of its location securely beneath the patio of an apartment complex in the Talpiot neighborhood of southern Jerusalem, was already very familiar to Bill. In 2005, he, as a representatvie of GE Inspection Technologies (a company that sells remote visual cameras) was a member of the technical team instrumental in providing the camera resources and expertise to explore the tomb using a 7.5 meter long industrial Videoprobe and a Cazoom PTZ (Pan Tilt Zoom) camera. Directed through a “soul pipe”, or long tubular opening reaching 25 feet down into the tomb beneath the patio surface, he and his colleagues, including Felix Golubev, investigating scholar James Tabor of the University of North Carolina, Charlotte, and filmmaker Simcha Jacabovici, were able to view and visually record the contents of the tomb without disturbing its sacred contents. The camera revealed burial niches and seven ossuaries (stone boxes containing the bones of the deceased), typical of many burials associated with the well-to-do Jewish inhabitants of 1st Century Jerusalem. Now, Felix was asking him to go back with the crew for a second probe.
_________________________________________________________________________________________
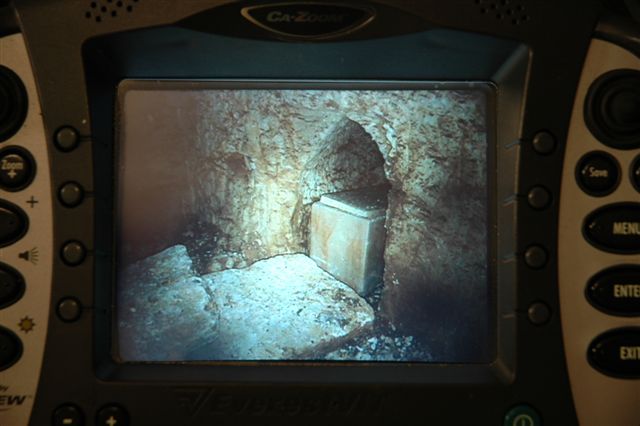
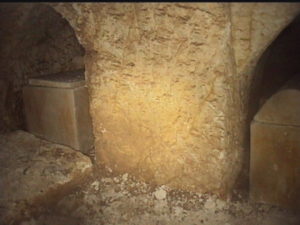
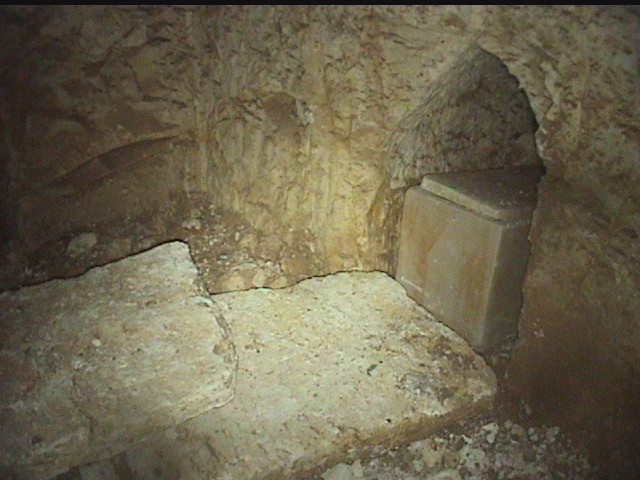
The first image of the ‘Patio Tomb’ taken during the 2005 exploration, showing an ossuary resting within a stone-cut niche. This tomb was unearthed and mapped briefly by archaeologists in 1981, then sealed off after protests.
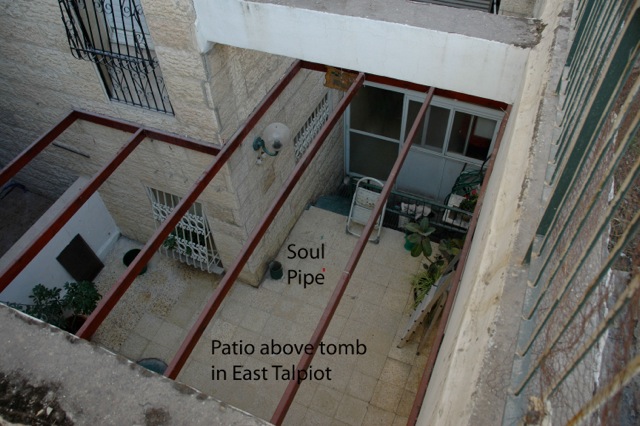 The “Patio Tomb” could be accessed only through a “soul pipe”, which led the remote camera system 25 feet below the apartment complex patio (built in modern times over the tomb location) to the tomb.
_______________________________________________________________________________________________________________________
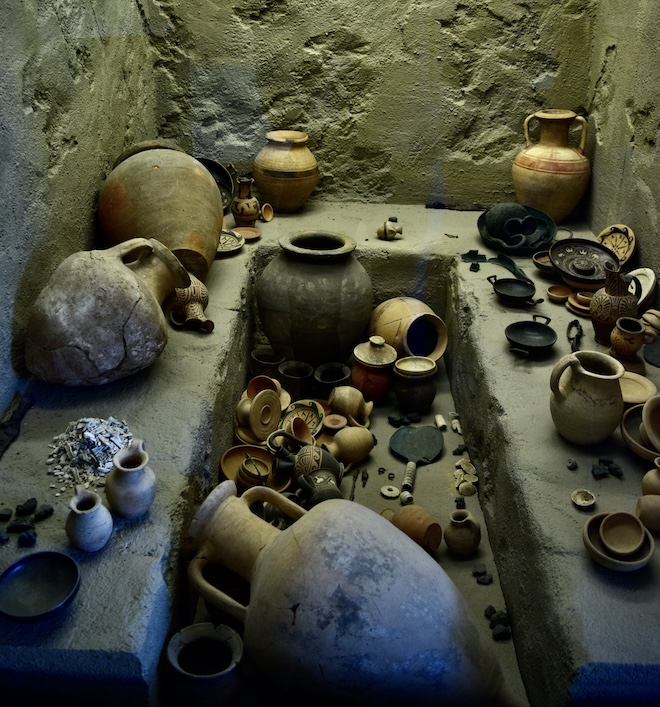
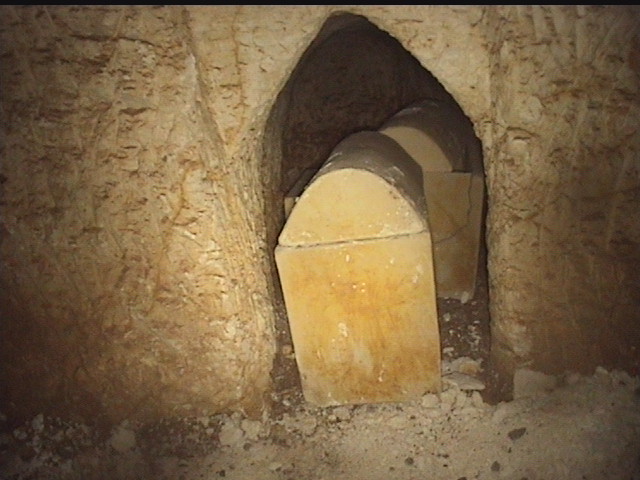
 Above and below: Views of separate ossuaries within their niches inside the tomb as viewed during the 2005 exploration.
_______________________________________________________________________________________________________________________
 ______________________________________________________________________________________________________________________
Bill had questions about the necessity of this second trip. “We filmed it for 2 days, dropping the camera through the soul pipe and saw nothing of great interest,” he said to Felix. In 2005, these ossuaries appeared to be unremarkable. They were only seven among many hundreds of similar bone boxes commonly found throughout the Jerusalem area over the years.
But now producer Felix and the other members of the research team wanted to get a much closer look at the ossuaries……close enough to detect and read any possible inscriptions on their sides, anything that would tell them more about who’s bones may occupy the boxes and with what family or group the tomb may be associated.
This got Bill’s attention. But this new expedition posed some unique challenges, requiring innovative thinking and bringing to bear the full professional capabilities of the technical team put together to help explore the tomb. In his own words, he explains how they did it……….
We met for lunch and Felix explained that they wanted to use a camera to get closer to the ossuaries and search for inscriptions to see if they could determine who was buried inside. From the video shot in 2005, we knew a PTZ would not work. It would not fit into the gaps between the ossuaries and the walls. We considered using a Rover Crawler with a zoom camera, but there was too much rubble on the floor of the tomb and the gaps between the ossuaries and the walls of the niches were too small, even if we cold drive it up to the ossuaries. We needed to use a smaller Videoprobe, but had to find a method to transport it 3 meters across the tomb. The probe we used to explore the tomb before was flexible along its entire length, causing it to droop, like a wet noodle. We needed a stiff extension for the Videoprobe arrangement.
_________________________________________________________________________________________
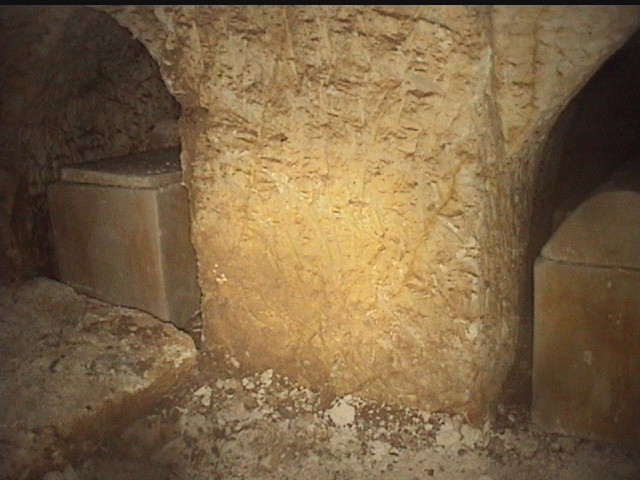
The narrow gaps between the ossuaries and the walls of the niches presented a major problem for a camera probe.
In the past, for industrial applications, I used carbon fiber poles, painters poles, and metal tubes, but these were hand-held and never 3 meters long. For this application, whatever transported the probe would be required to first go down several meters, then be raised up to be parallel to the floor and then extend 3+ meters. Clearly we needed a custom solution.
Manufacturers and operators of high value assets can afford to contract with engineering companies to design and build highly automated and sophisticated tools, justifying the cost vs. savings. In our case there were no savings. The cost was to come out of the film shooting budget. This was not the Titanic or Mission Impossible. This was a project based on a hunch that there was something interesting inside the Patio Tomb.
Through a referral from a friend, Felix met Walter Klassen, an expert in two disciplines related to major motion pictures and TV. He is a special effects prop creator and a manufacturer of steady-cam equipment. His experience in remotely moving objects and expertise in cameras created a perfect match. His devotion to the movie business and love of a good challenge brought him on board. He would work within the limited budget to create a robotic arm that was crucial to the success of this venture.
Felix and I met with Walter at his studio in downtown Toronto. Felix brought out the tomb map, the building drawing and pictures of the patio and frame grabs from inside the tomb. We discussed several key questions before coming up with a specification for the arm.
How were we going to get into the tomb?
Through the Soul Pipe
The Soul Pipe is 6” in diameter and 25 feet long, running inside a cement pylon and opening up near the roof of the tomb through a 90 degree elbow.
Walter stated that the 6” opening and 25-foot drop down to the tomb was feasible, but the elbow at the end of the soul pipe was problematic, for two reasons. The extension arm would have to be made of a material that could bend to negotiate the elbow, yet become rigid to support the cameras at the end. Secondly, the arm needed to rotate to cover the tomb, and the elbow would prevent any left/right movement.
There was another possible solution………
Drill a [new] core hole from the patio straight into the tomb.
From Walters perspective, this was possible, eliminating the incompatibility of the previous arrangement. His concerns now were the extra weight of the extension poles required and the longer lengths of the necessary control cables.
From my perspective, using a larger PTZ camera would not be a problem as all of its functions were electrical. The pan, tilt, zoom, lights and focus were controlled through the single cable and that cable could be 600 feet long. However, the Videoprobe was a concern because of the length required to do the job. The 25 feet from the patio down to the tomb and the 15 feet needed in the tomb required a 40 foot probe. Though GE makes probes in lengths up to 100 feet, for this application I wanted to keep the length down to 25 feet. I needed as much light as possible to capture better images. Light travelling through glass fibers will attenuate, and the longer the probe, the less light. The color also changes — the longer the probe, the greener the light. I also wanted as much articulation as possible. The ability to move the camera head as much as 150 degrees (we actually went 180 degrees) would be needed to get into the tight places.
From Felix’s perspective, he had to find another way into the tomb. Even if he could drill the 25 feet, the cost would be high, and it would generate a lot of noise and vibration that would disturb the neighbors.
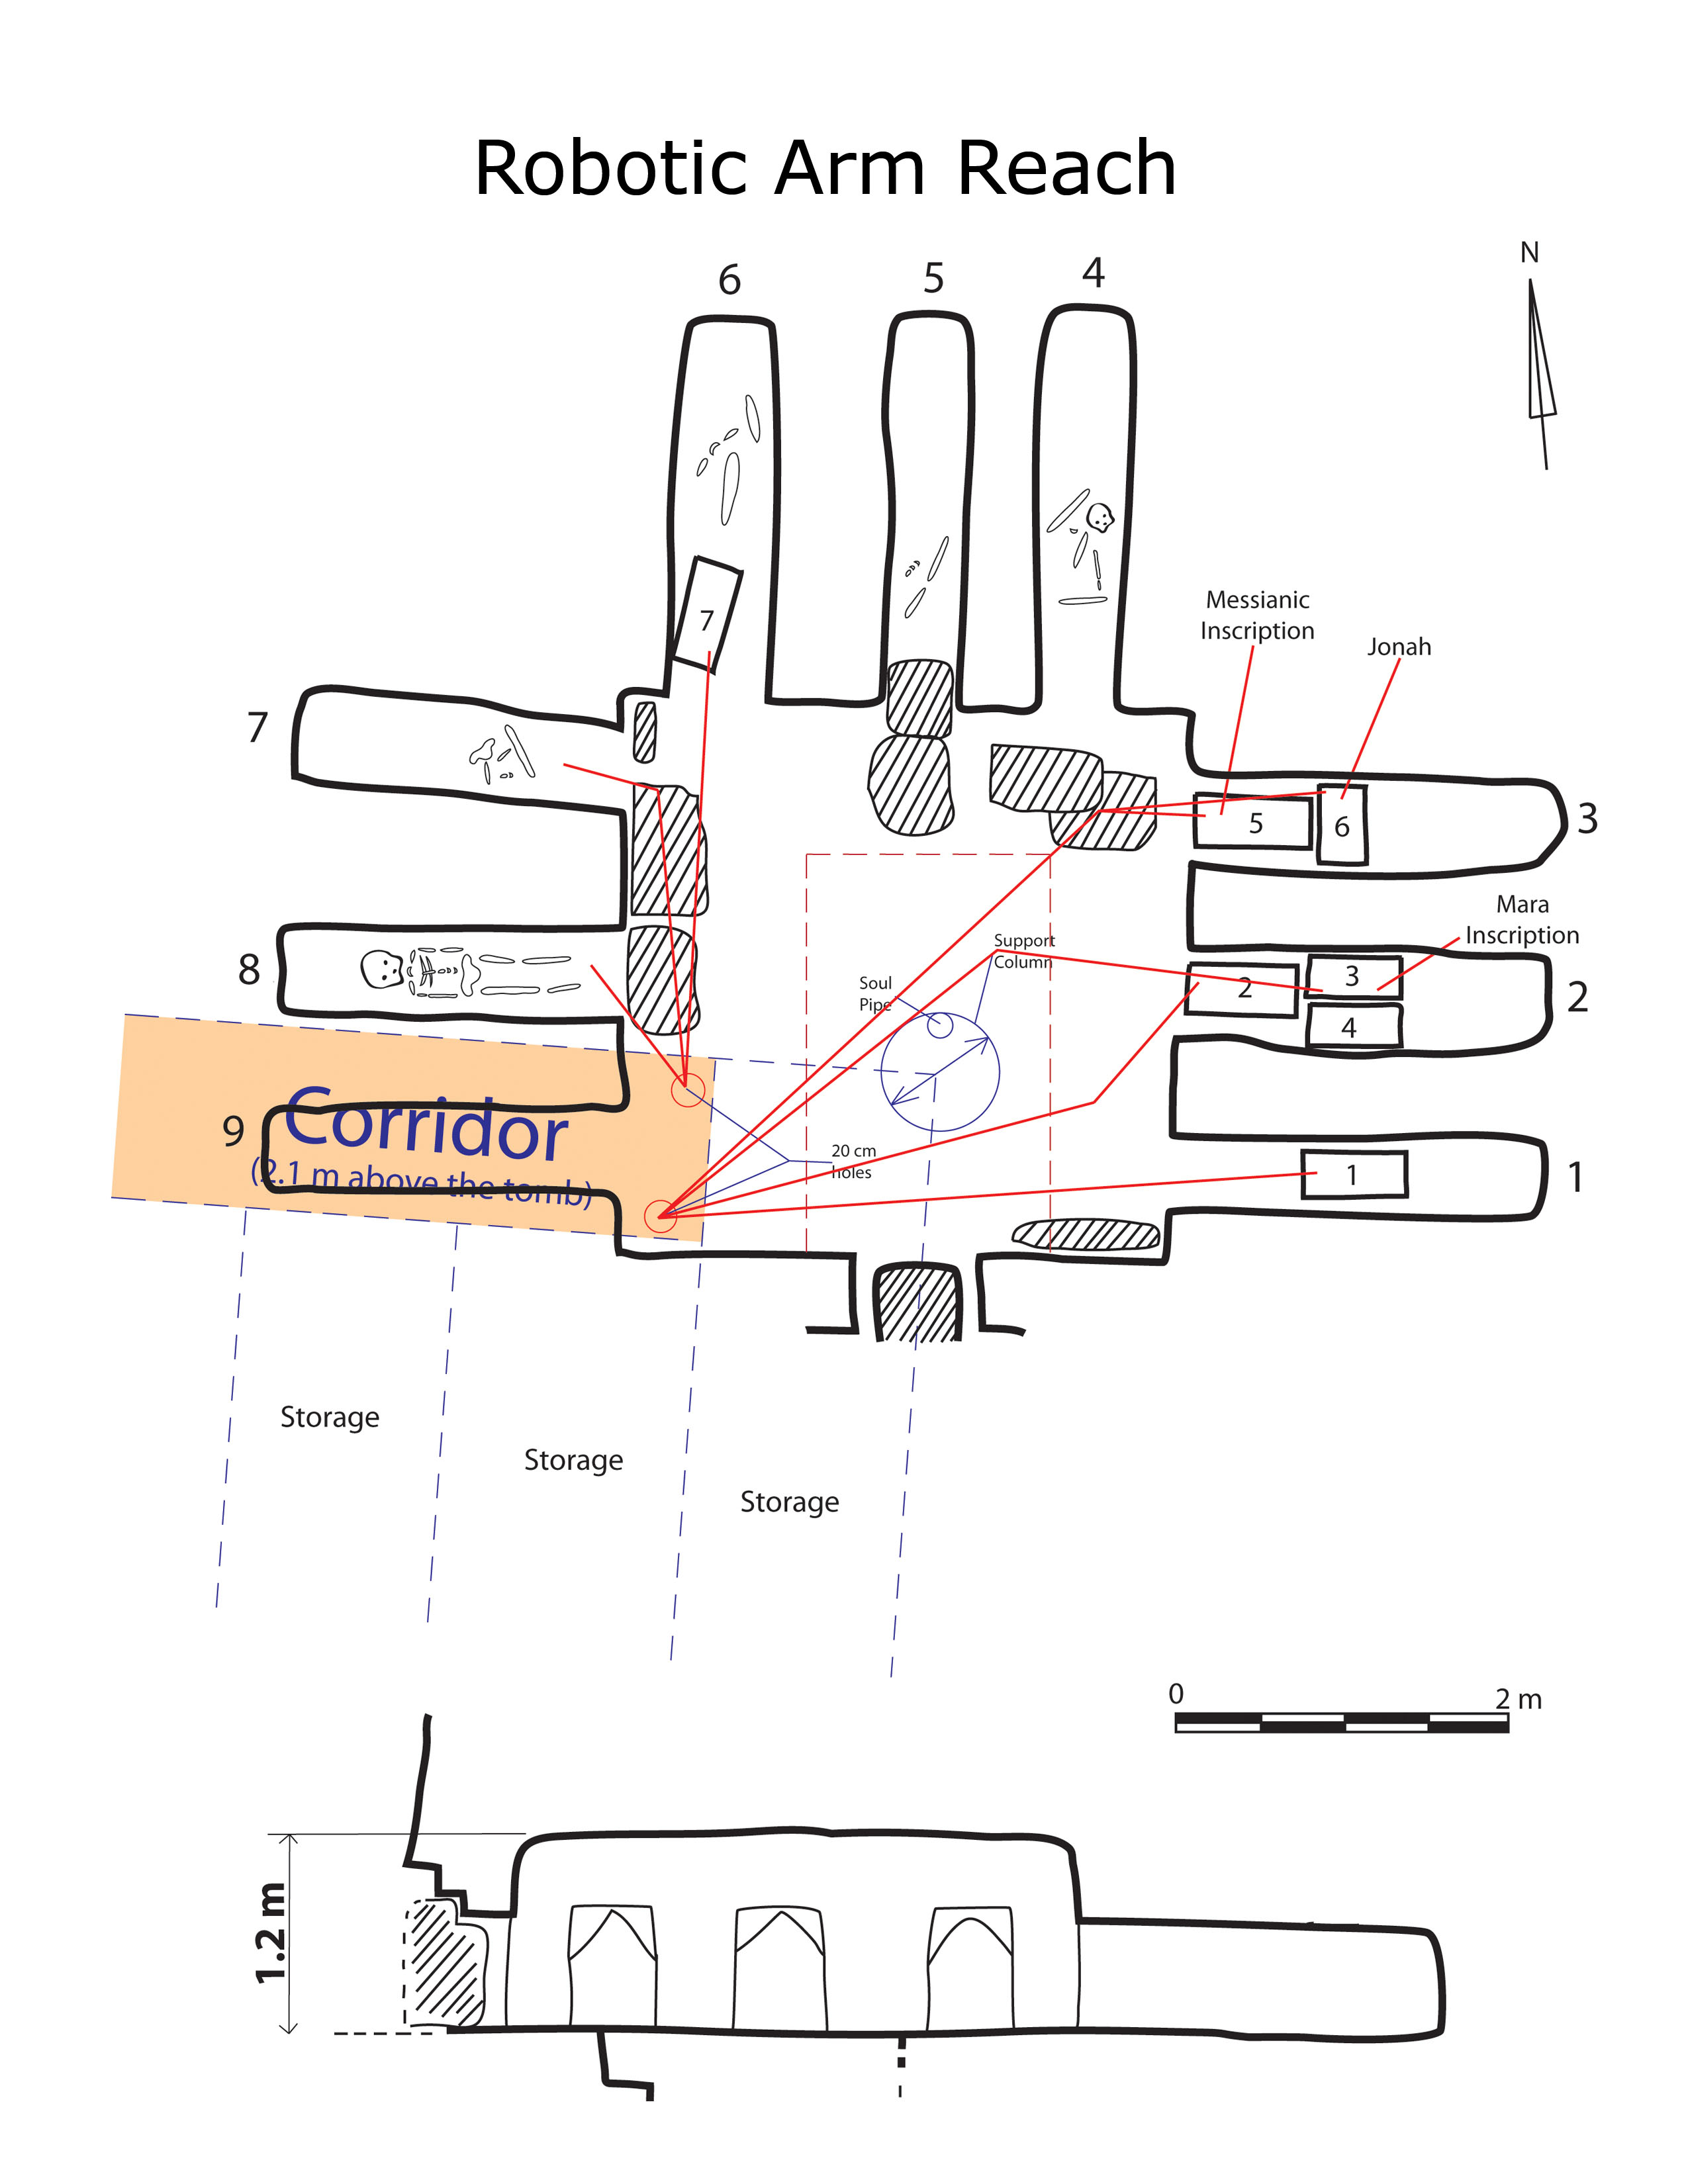
The next critical questions were: How far did the arm have to reach? How high was the ceiling from the floor and how big will the access hole be?
The rough sketch of the tomb done in 1981 (when it was unearthed and mapped briefly by archaeologists in 1981, then sealed off after protests) showed it to be about 3 meters by 3 meters square. The 9 burial niches that were on the north, east and west side appeared to be just under 2 meters deep. It was agreed that if these measurements were close, the arm needed to extend to 3 meters. The insertion of the videoprobe into the niches would thus be accomplished by using a combination of a rigid tube, semi rigid tube and the probe itself.
Based on previous caves found and images taken from the video, the best guestimate was 1 meter high.
_______________________________________________________________________________________
 ____________________________________________________________________________________________________________________
So it was agreed that the robotic arm would compact into a meter bend at the ceiling level and clear the floor when it was raised to a horizontal level. It would then extend as needed to a maximum of 3 meters. It would also be able to rotate 360 degrees with a 4-pound PTZ camera, cable and a 25-foot videoprobe at its distal end.
Walter had what he needed to get started. Felix was on his way back to Israel to find a better place to drill that was closer to the tomb. Using the soul pipe and support pylon as a reference, Felix, working with local civil engineers, overlaid the tomb map with the original drawings of the building. They determined that only two locations would work. One was east of the pylon and one west of the pylon. The east spot was located inside a tenant’s storage locker, the west in the hallway outside the locker. The tenant did not want to cooperate, which left the hallway as the only spot to drill.
Felix hired a Ground Penetrating Radar (GPR) expert to survey the corridor to try to validate his best guess as to where to drill. The GPR indicated a void could be present at the end of the hall. Next, he contacted a local concrete drilling company to quote on drilling a 20 cm wide, two-meter deep hole. They determined a one meter long diamond tipped core bit was required to complete the job.
Measuring the Size of the Tomb
Before bringing Walter and the arm to Israel, the size of the tomb had to be confirmed. If the size of the tomb was even a half meter larger than the drawing, the arm would not reach. Modifying the arm in Israel was not an option. We had to measure the tomb from our entry point at the end of the hall.
Walter built a simple arm that we could lower into the tomb and raise the boom with the camera on the end. We rented a Cinetape ultrasonic range finder to attach to the PTZ camera. In June of 2010 I made the first of 3 trips to Israel. This trip had three objectives; get into the tomb, measure the tomb and find out if there was anything else we would need for the main shoot.
Drilling the first hole went well. The core bit slowly chewed through the limestone and reached 2 meters where Felix expected to break through into the tomb. The drillers continued. At 2.2 meters, no tomb. At 2.4 meters, no tomb. A decision was made to drill a second hole on an angle towards the tomb. At 2.4 meters, we were still drilling rock. All eyes were on Felix, wondering if he totally miscalculated and we were drilling in the wrong spot. We packed it in for the day.
After a tense meeting over dinner, we decided to drill a little bit deeper into the first hole. Even if we broke through in the wrong place, the camera would show us where we were on the map. At 8 a.m. the next morning we set up and the drillers began. At 2.5 meters the bit cut into the tomb. We were inside and Felix was right. He went from zero to hero as a result of 10 cm of limestone.
The measurement went according to plan and we confirmed that the size matched the drawing. As for the third objective, to determine what else was needed, we had some thoughts. From our new perspective, we got a better look at where the ossuaries were placed. Some were so close to the walls or to each other that I was concerned about getting the videoprobe, not closer, but further away in order to capture a wider view. I was also concerned about articulating the camera, should there not be enough room. When back in Toronto Felix, Walter and I planned to discuss some options.
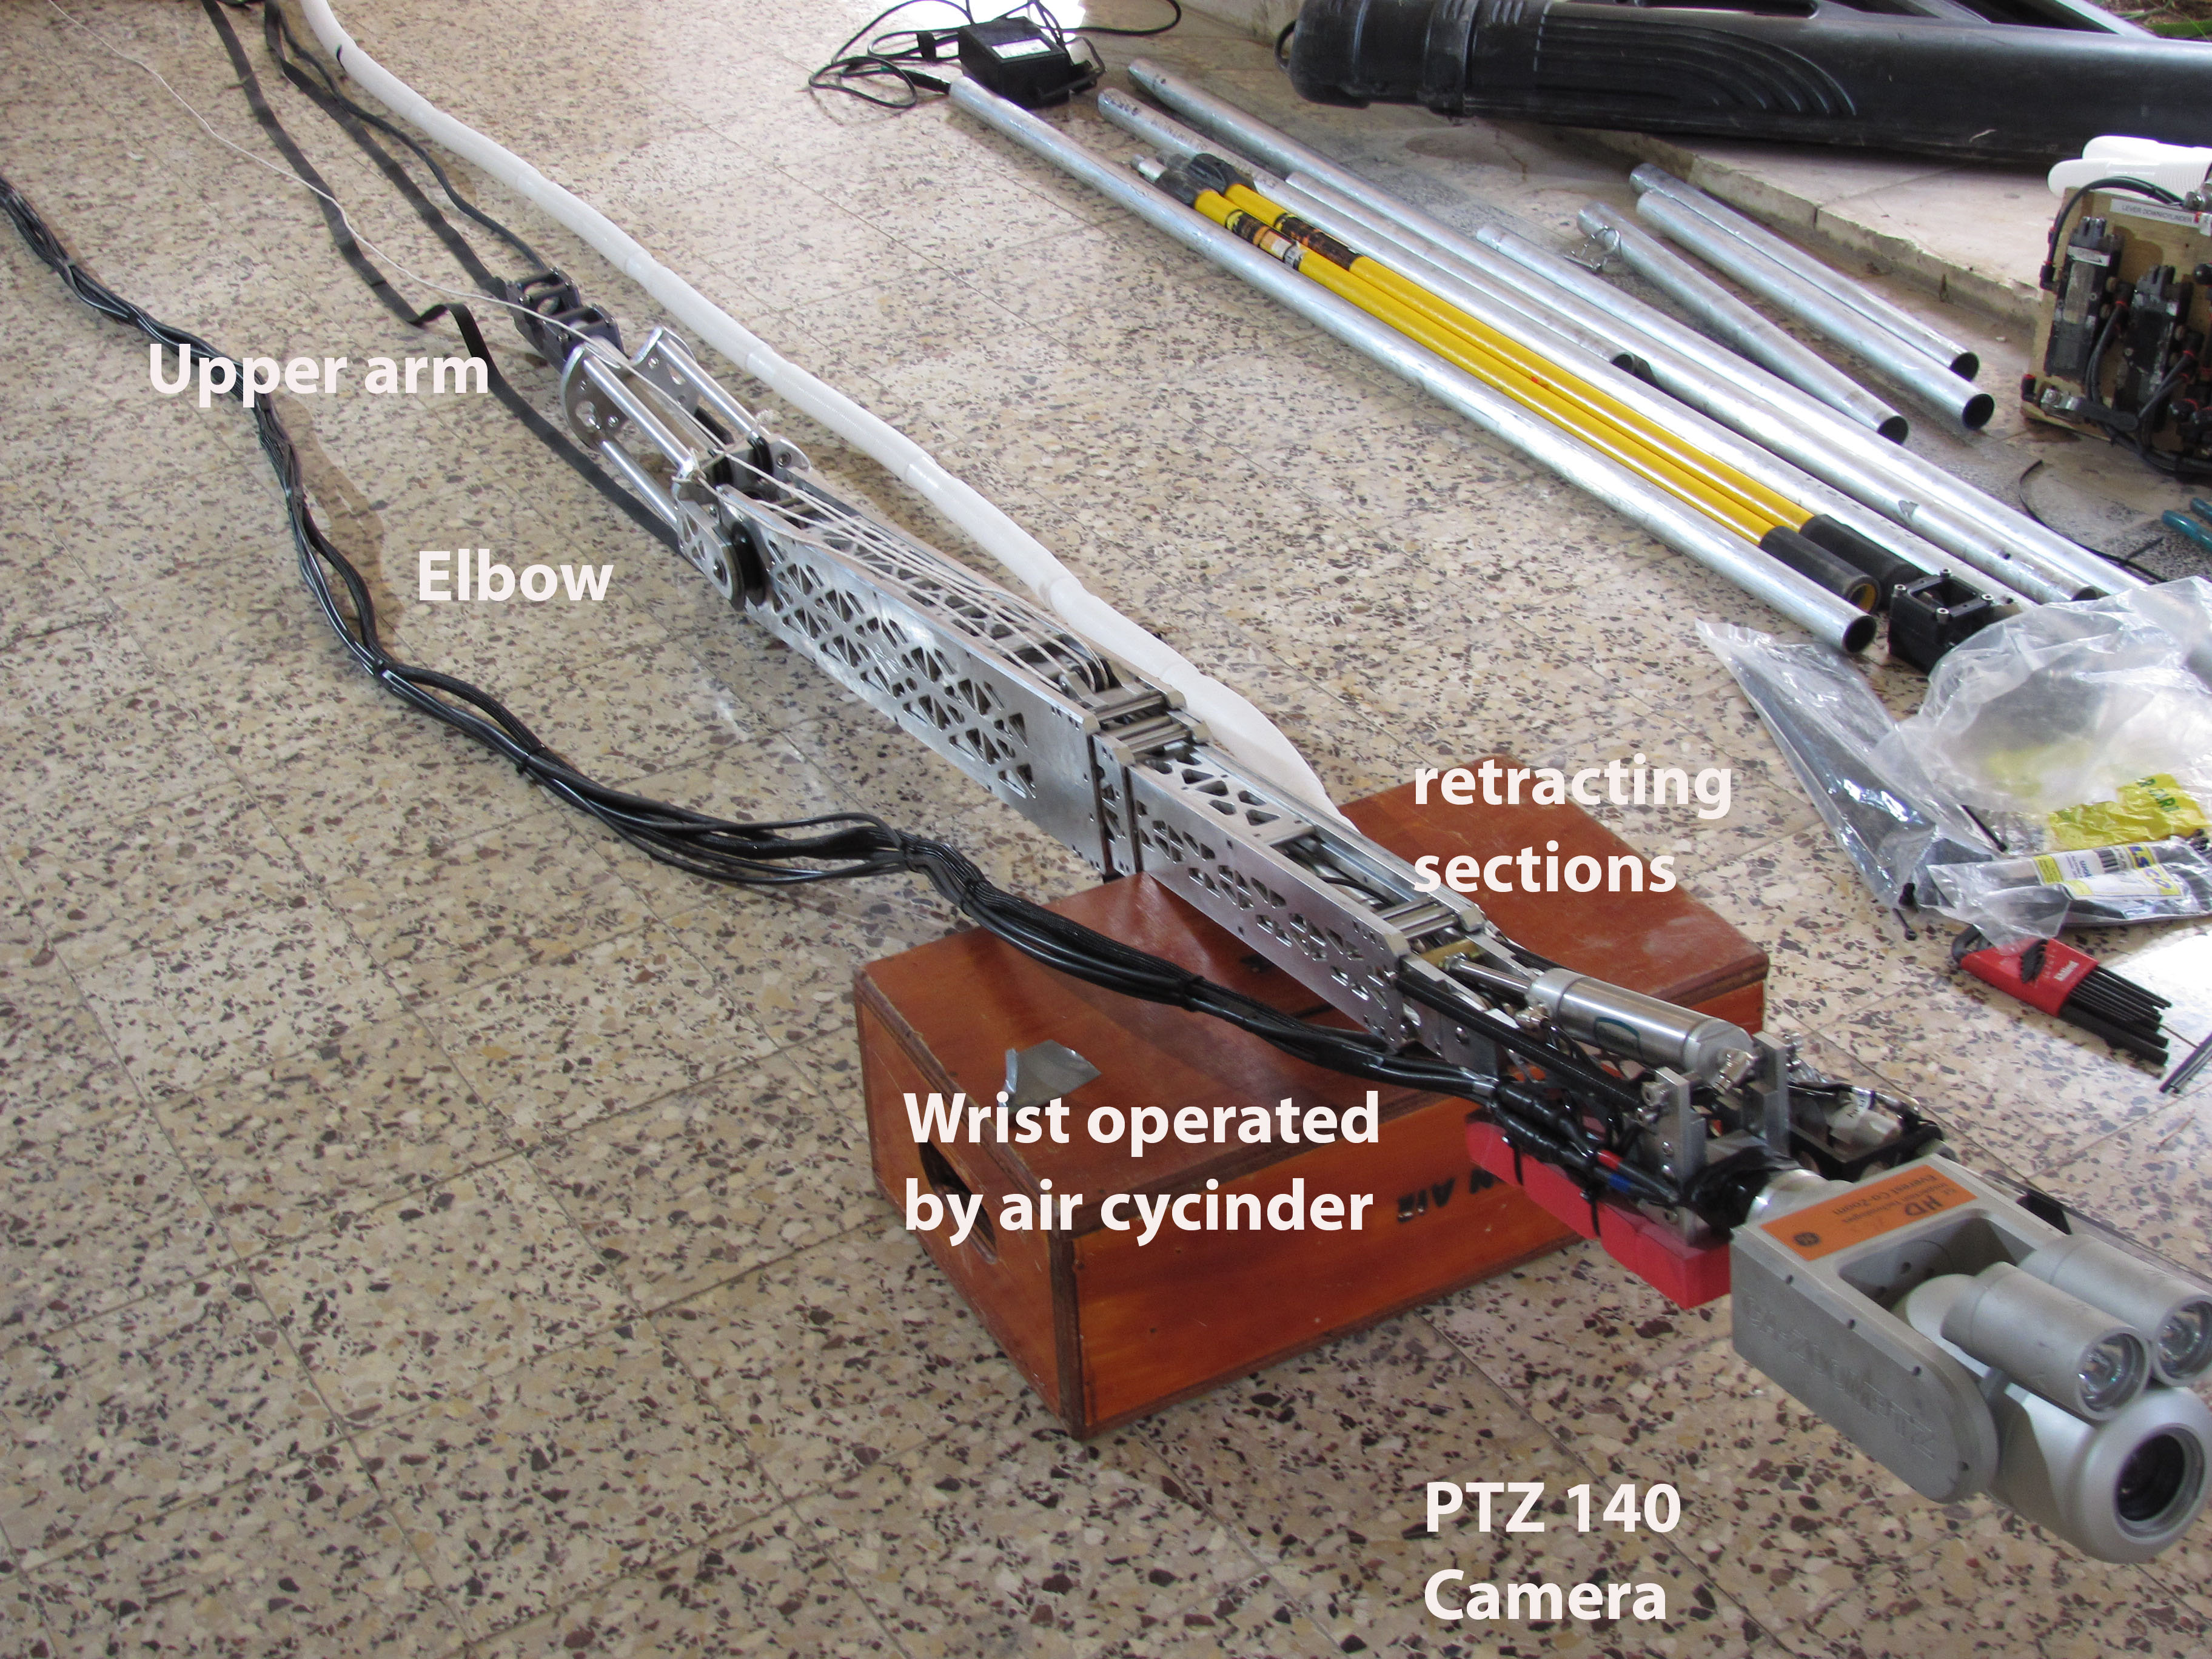
We visited Walter soon after our return. The arm was 90% complete. Using the human arm as a reference to describe the robotic one, there were three sections. From the elbow to the shoulder were the metal poles at the top end of the arm. The elbow section articulated from 0 to 110 degrees. The ulna/radius from the elbow had four sections: The inner three would retract and extend into the outer section, fixed at the elbow. Two of the sliding parts were moved with a series of pulleys, controlled by a winch at the top. The third section was motor driven. This third section, in addition to moving in and out, could also move left and right. Finally, at the wrist there was an air cylinder that could move the camera from 0 to 90 degrees. The main reason for this was to allow Walter to increase the length of the arm and still clear the one meter ceiling to floor distance. (See photo illustration below of the entire apparatus)
_________________________________________________________________________________________
 _____________________________________________________________________________________________________________________
The insertion sequence would go like this:
1 The arm fully retracted and the camera head at 0 degrees.
2 The total arm carried into the hallway, then inserted into the hole.
3 Walter to connect the seat, winches and air control panel.
4 From the second hole we insert another PTZ camera to watch the arm.
5 The arm is lowered until the camera clears the ceiling.
6 The camera is raised to 90 degrees as the arm is lowered to the elbow.
7 Once the elbow is clear, the arm is raised with the up-down winch.
8 The camera is then lowered to 0 degrees so as not to hit the ceiling.
9 The arm is raised to 90 degrees and the in-out winch extends the two sections.
10 The motor is activated and extends the last section.
Once inside the tomb, the boom could be rotated left and right by moving the poles that made up the humerus (upper arm). The ulna/radius could extend and contract, the section connected to the wrist could move left and right and the camera could tilt up and down from 0 to 90 degrees.
_________________________________________________________________________________________
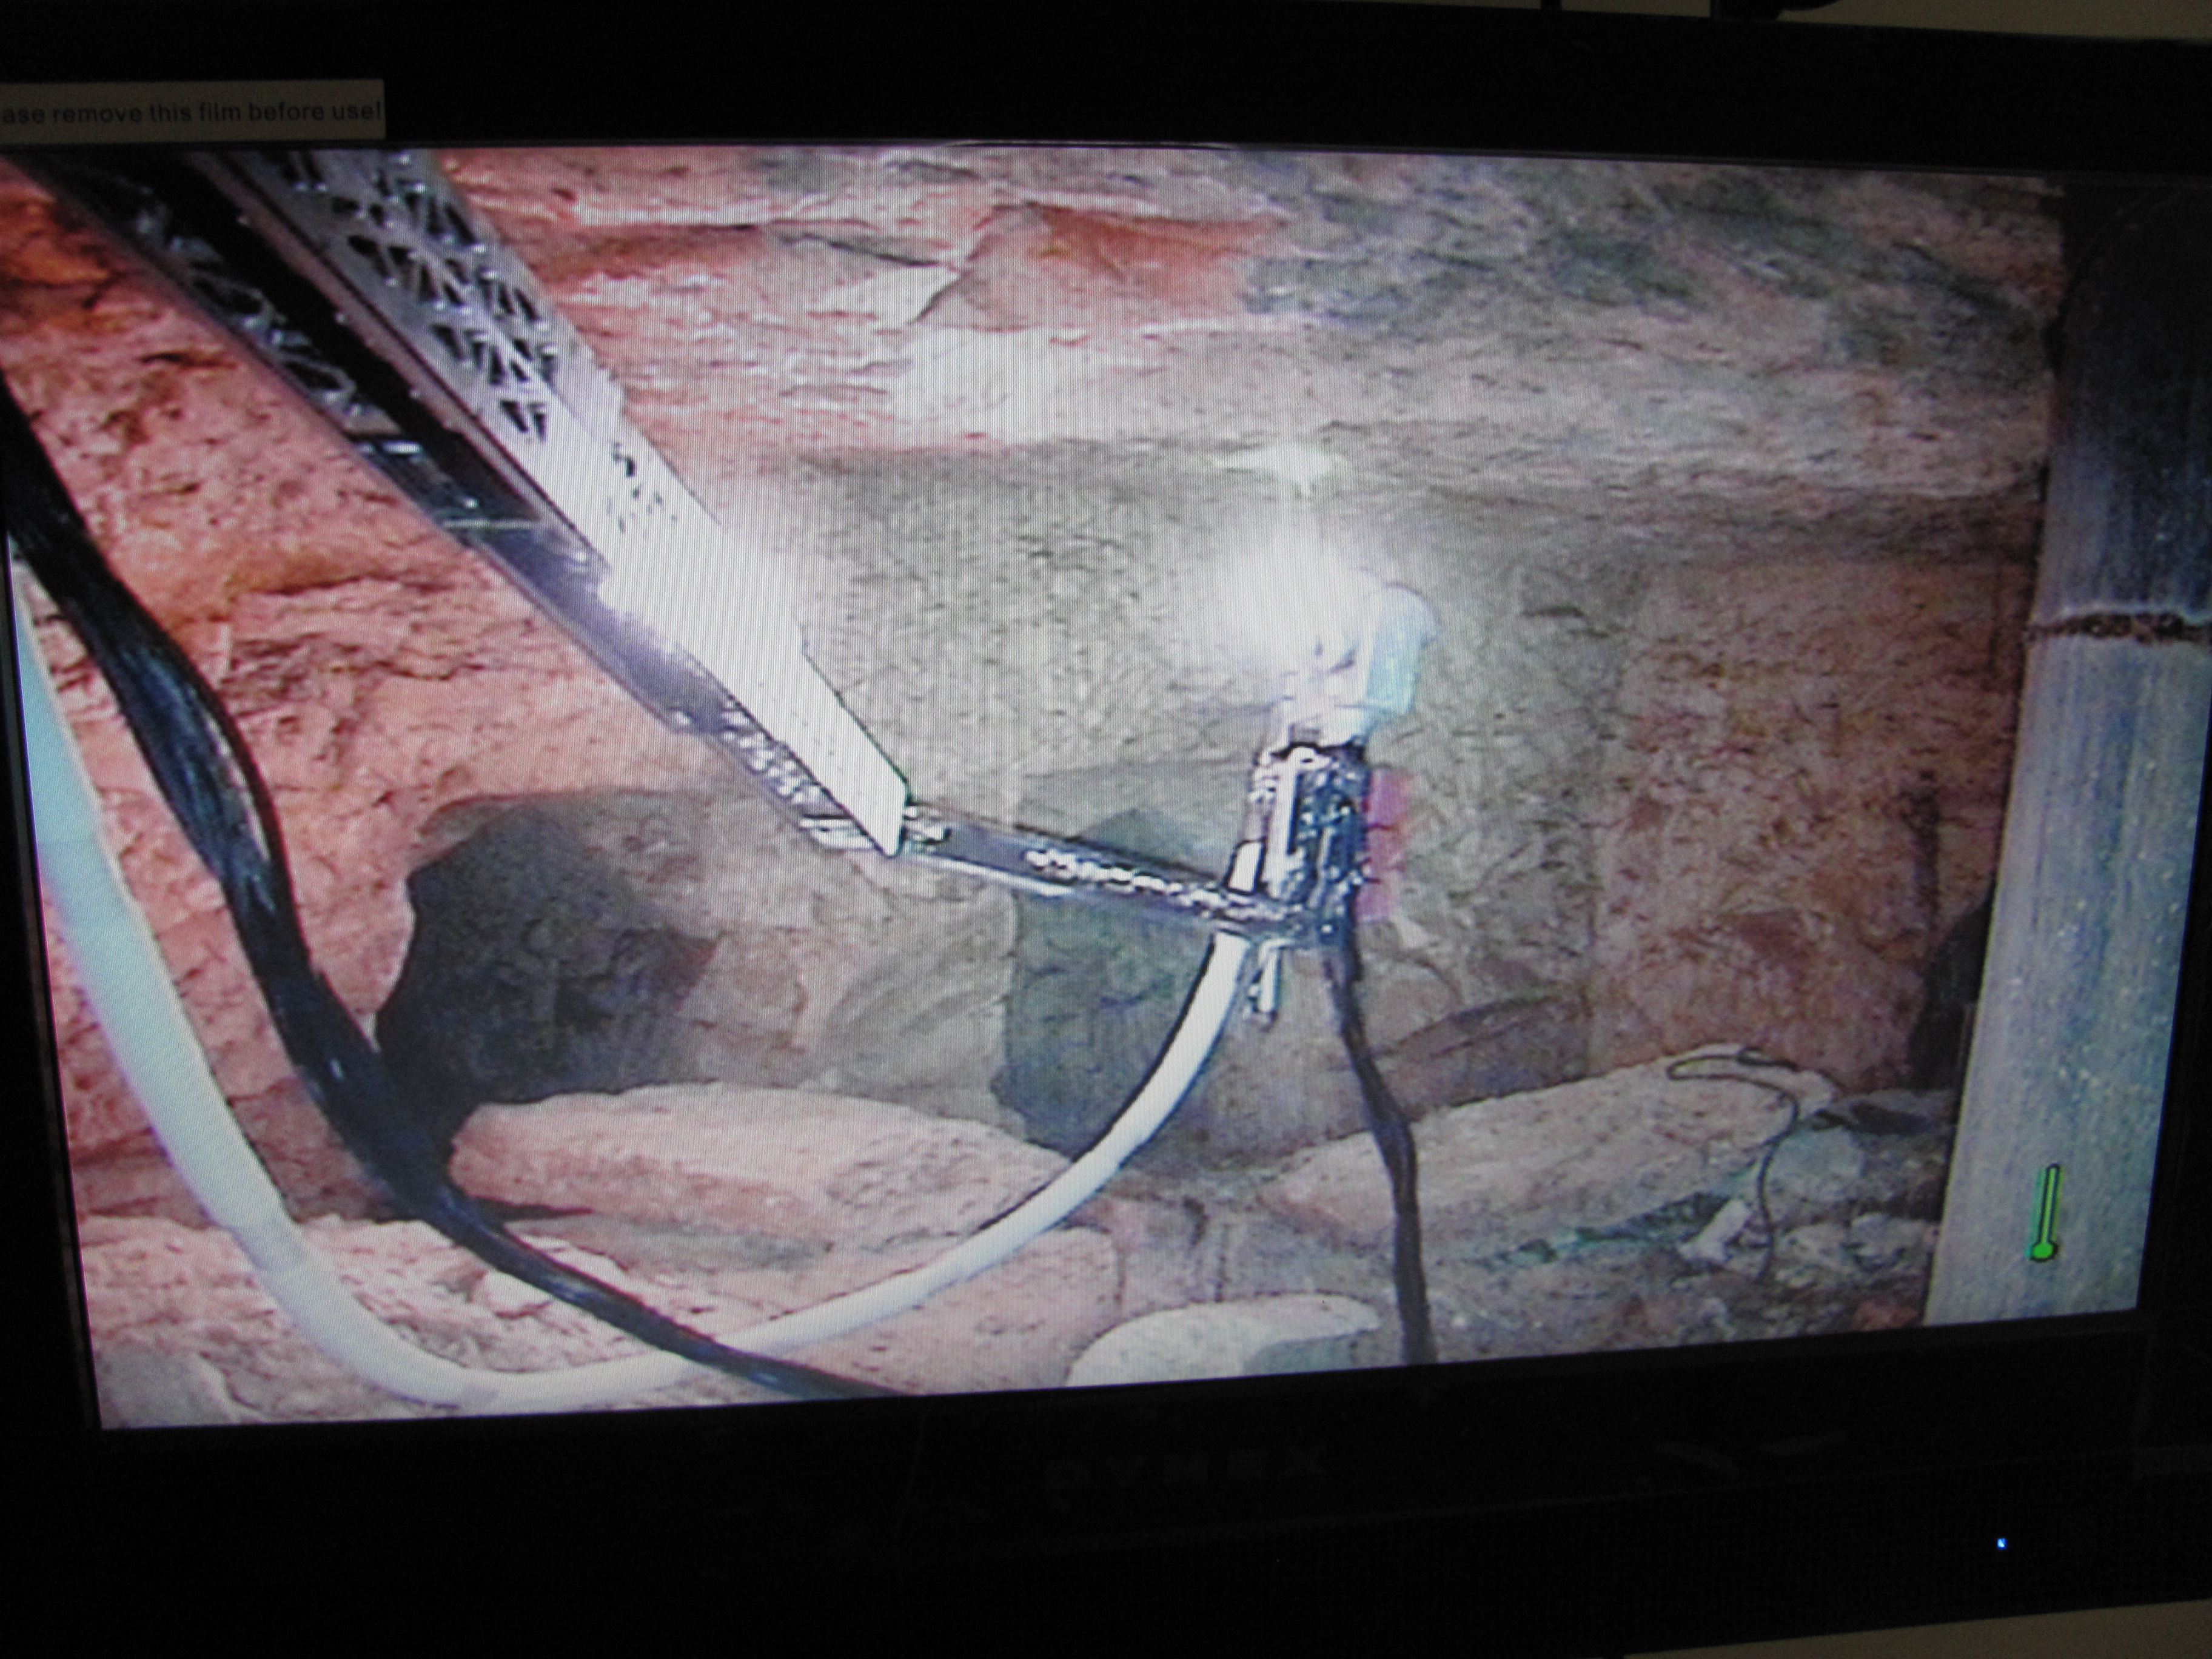 View of arm articulated camera up inside the tomb. Image taken from HD monitor.
______________________________________________________________________________________________________________________
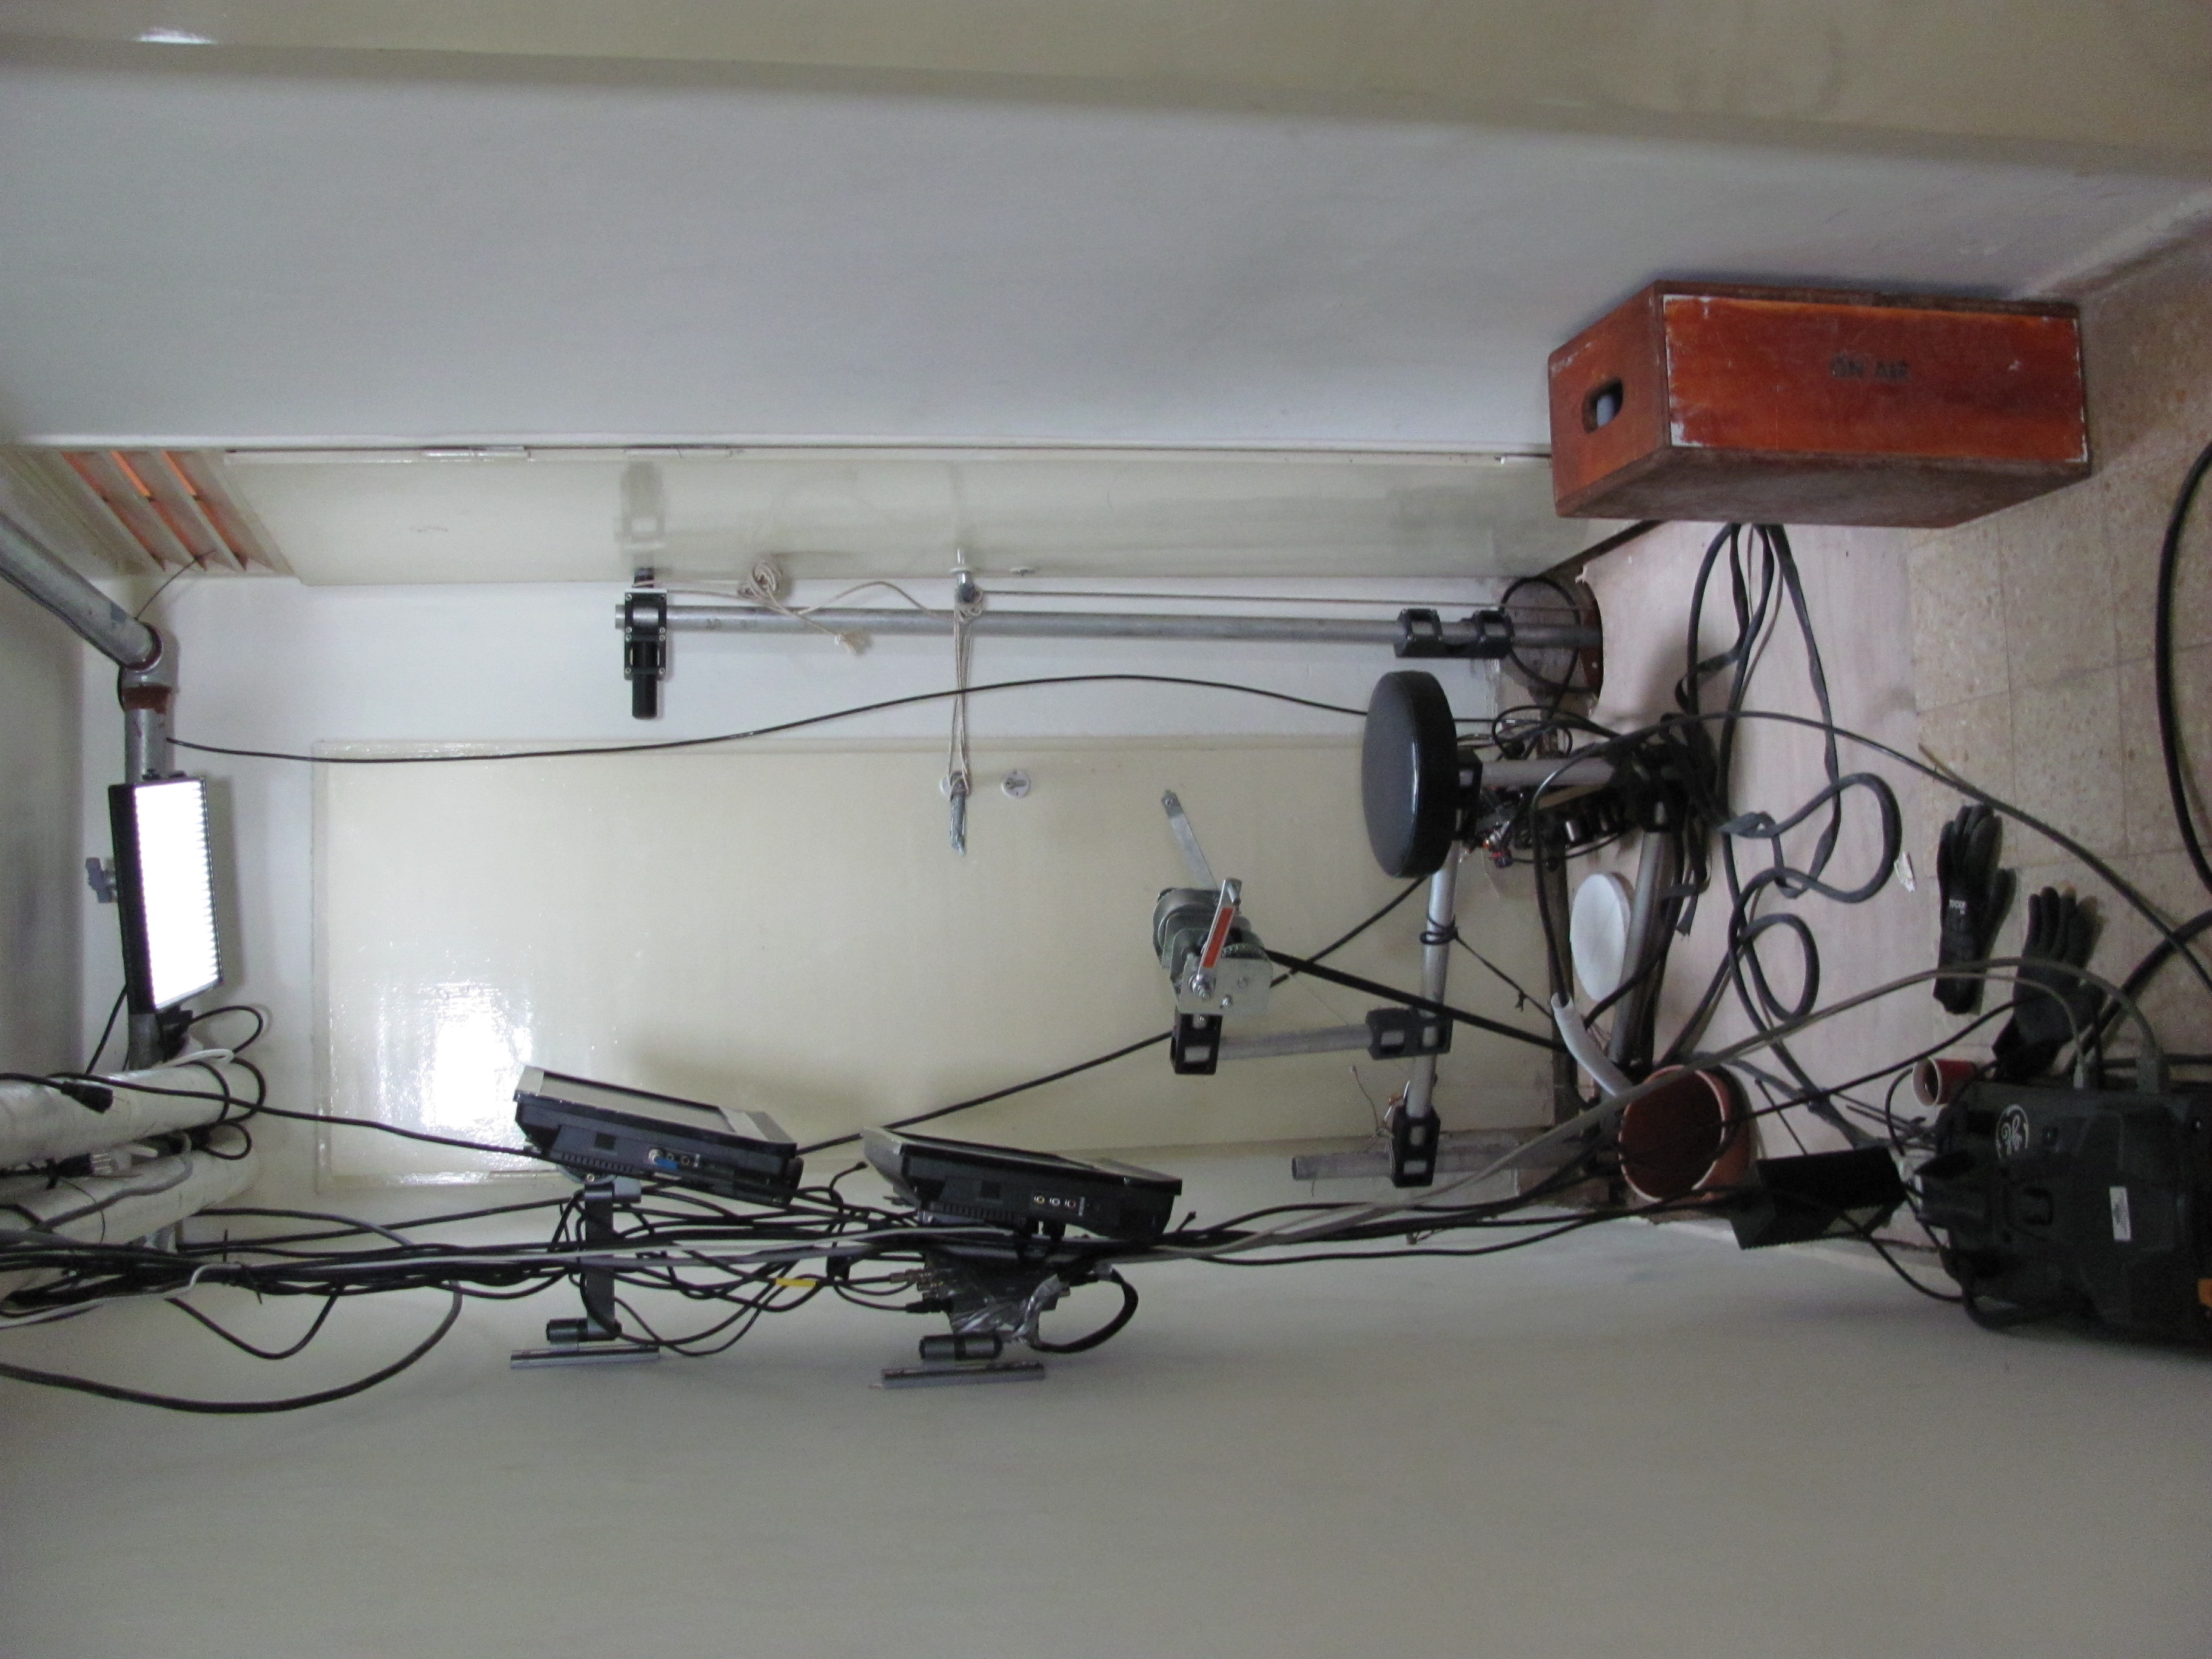 The arm aparatus set up at the end of the hall.
______________________________________________________________________________________________________________________
In addition to the range of motion of the robotic arm, the PTZ camera (pictured below) could rotate + / – 177 degrees and tilt + / – 140 and optically zoom in 10 to 1 (see drawing). The XLG3 Videoprobe which ran from the surface to the end of the arm through a semi flexible tube also had full range of motion, extending out from the tube and being able to articulate in all directions. The G3 also had interchangeable lenses allowing for wide angle and close up views.

More Challenges
We discussed a major concern I had about the lack of space between the wall and the ossuaries. Because we could not change to a smaller Videoprobe, we were left with one possible solution…….move the ossuaries. Unfortunately, the agreement the producers made with the relevant parties was that we could not touch or move anything. This became a moot point. However, there was a challenge on the table and Walter and I thought of ways to do it, if we could.
The arm would not have enough torque to move the ossuary, nor could it retract with enough force to pull the ossuary if we managed to get a grappling hook into it. I proposed that we attach a large fish hook to a small steel cable that ran to the surface and pull on it. But Walter responded with a much more practical method. He proposed an air bladder that would attach to a small pneumatic piston. The flat bladder would be positioned between the wall and the ossuary and then inflated. The more air, the more it would move.
We thus had a solution and it would not cost more than a few dollars for the bladder, cylinder and an airline. Walter built it into the arm on the off chance that, if we needed it, we could ask permission to use it. If they said no, we were no worse off.
We did not get to use it. In some way, the Haredim (orthodox Jews) who were monitoring the investigation knew about it before we arrived. This would not have been included in this narrative, except that it solved a different problem we had on the first day of the shoot.
Recall that we measured the tomb from the first drilled hole. From that vantage point, we could see most of the tomb, but the support pylon prevented us from seeing into the first niche on the east side of the tomb. When we went to look at niche 1 from the third hole we could not reach the ossuary with the Videoprobe. We were almost a meter short. The producers were very disappointed. All that measuring and extra expense, and we were still short. The problem was that the ossuary was set over a meter deep into the niche. Had it been where the map showed it, we would have been in a better position.
The producers called Walter and I aside, but still let the camera roll the tape and then later let us know how they felt. We asked for some time to come up with a way to extend the reach.
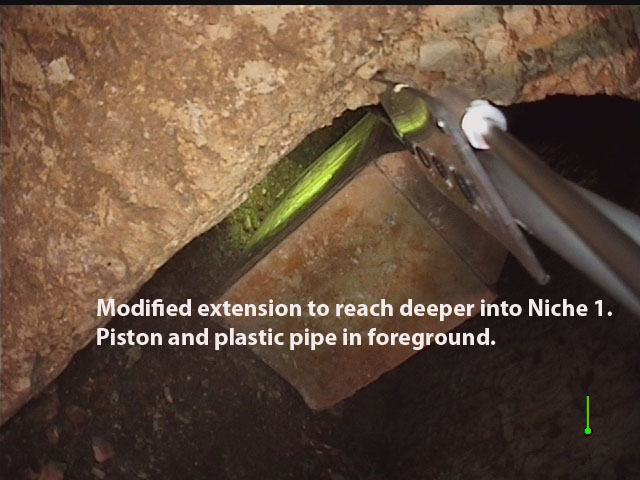
After thinking it through, we decided to use the space used by the bladder at the end of the piston and added a rigid plastic pipe to where the bladder was to have been. Coupled with the length of the piston, we added about .8 of a meter. That was enough to reach where we had to get in niche #1. This kluged solution actually gave us much more reach and control than we had before it was added.
 ______________________________________________________________________________________________________________________
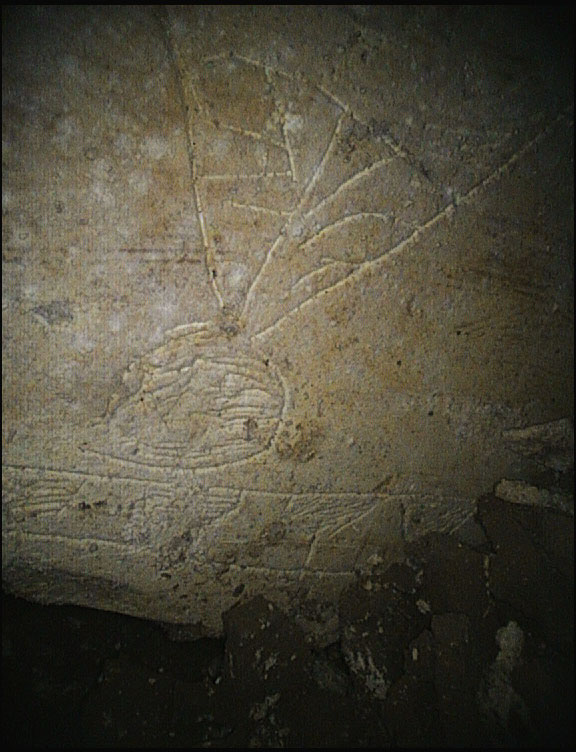
We spent a week in September of 2010 investigating every niche and ossuary and documented it all on tape. We discovered two significant and now very controversial ossuaries (which included the news-making “Jonah” ossuary). They were the last two we shot in niche 3. Both were difficult to reach and capture with the Videoprobe, as the distance between objects was small. What we saw could not have been discovered by a PTZ. Only by manipulating the camera into the spaces and taking shots at all possible angles were we able to see the Greek inscription clearly enough to read most if it without post enhancements (that is, not enhancing the images after the shot, but adjusting exposure, contrast etc.)
_________________________________________________________________________________________
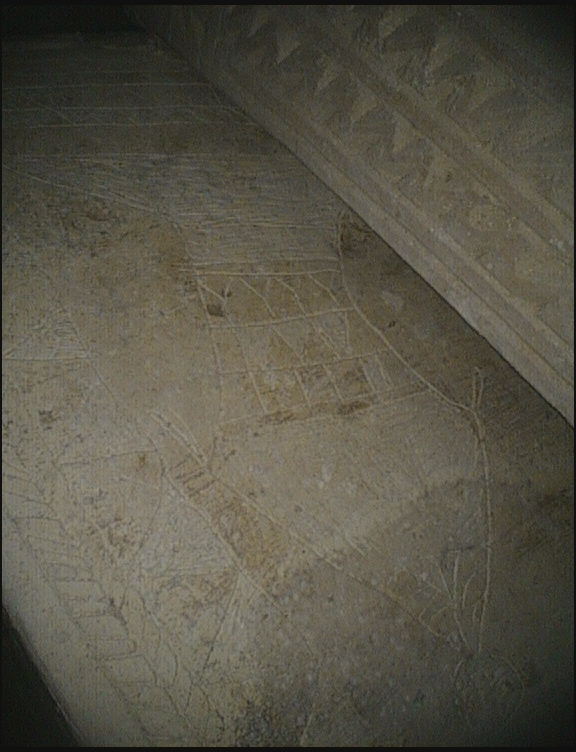
Above and below: Views of the inscribed images discovered on the “Jonah Ossuary”, made possible through the robotic arm camera system devised by the team engineers.
 ______________________________________________________________________________________________________________________
The Broadcasters were happy with what we shot, but complained that much of the story was shot inside the tomb, which was done in standard definition. They asked if it were possible to reshoot the tomb in HD. Felix asked me if there was anything I could do to make it happen.
Rising to the challenge, I called Kevin Bush, the engineer in charge of the PTZ product line. In his laid back central New York State manner, he said it was possible. That was all I needed to hear. I told Felix we could do it, but he would have to pay for Kevin to join us in Israel. My logic was twofold. One, it was a great incentive for Kevin to skunkwork the project and get it built, and two, if something happened to the camera while in Israel, he would be in a position to fix it. Felix agreed, Kevin agreed and another problem was solved.
One last technology item before this saga ends. Rami Arav, one of the archaeologists working on this project, asked for a way to measure the tomb, as this is a common practice on all archaeological digs.
The solution was simple. The PTZ had an optional laser measurement feature. A pair of red lasers with a 2” distance between them was used as a reference measurement on a captured, still image. We calibrated the screen by placing cursers on the laser dots and assigning the distance between them as 2”, as that distance is constant regardless of how far away the camera is. We could then place new cursers anywhere on the image and the computer would calculate the actual distance.
_________________________________________________________________________________________
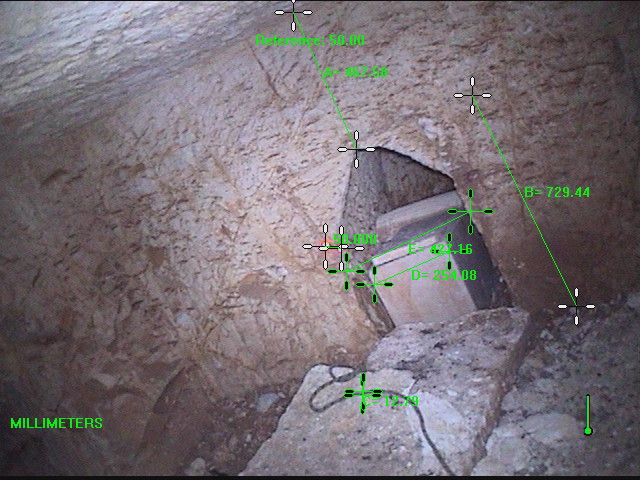
Taking the laser measurements
_________________________________________________________________________________________
In conclusion, I feel fortunate that the success of the robotic arm and remote cameras was showcased in a documentary. But most importantly, this experience taught me that anything can be done if you get the right people on your team and believe in what you are doing. Fortunately, I did not have to interpret or justify the significance of the discoveries. My job was to help discover.
__________________________________________
*What is the controversy surrounding the Patio Tomb? Among other things, the cameras captured inscriptions and images that, according to the principal investigators, suggested possible examples of the earliest Christian art or symbolism, depicting the concept of a resurrection, a core belief of Christianity. Although the interpretation of the finds is steeped in dispute among scholars, the art could predate by at least 200 years the earliest Christian symbols now known to exist in the catacombs of Rome. See “The Resurrection Tomb” in this issue for more about the exploration and finds of the Patio Tomb.
__________________________________________
All photos credit William Tarant, GE Inspection Technologies and Associated Producers, Ltd.
________________________________________________
Read about the most fascinating discoveries with a premium subscription to Popular Archaeology Magazine. Find out what Popular Archaeology Magazine is all about.