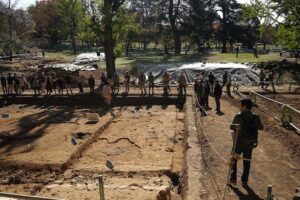
Japan’s archaeological landscape stretches across thousands of years, from Paleolithic ground surfaces and pottery-making Jomon communities to Yayoi fortified settlements, Kofun-period tomb landscapes, and early state capitals. For a trip, the best approach is simple: focus on sites where you can actually read the evidence on the ground, then use museums and interpretation centers to complete the picture.
What makes the Best Archaeological Sites in Japan so rewarding? You are not only looking at old objects behind glass. You can walk through reconstructed pit dwellings, trace defensive moats, stand beside keyhole-shaped tombs, and study preserved stratigraphy exactly where archaeologists found it.
This guide starts with the strongest flagship sites, then moves through period-by-period highlights, Tokyo options, famous Japanese artifacts, practical itineraries, visitor-style comparisons, and a quick FAQ.
Top Archaeological Sites in Japan
The best first stops pair genuine in-situ remains with clear interpretation. These four sites cover different eras and different ways of seeing archaeology: reconstructed settlement life, fortified community layout, monumental tomb landscapes, and indoor stratigraphy.
Sannai-Maruyama Archaeological Site
Best for: reconstructed settlement life
Period: Jomon period — one of the largest known Jomon settlements, showing long-term village scale rather than a small seasonal camp
What you’ll actually see: rebuilt pit dwellings, a large post-supported structure with towering wooden pillars, a raised-floor storehouse, and museum displays of pottery and tools recovered from the site
Don’t miss: the six-pillar structure, reconstructed from actual postholes found during excavation—the physical evidence is displayed alongside the rebuild so you can compare archaeological find to interpretation
Time needed on-site: half-day
Sannai-Maruyama is one of the clearest places to understand Jomon settlement life without guesswork. The pit dwellings and towering post structure are modern reconstructions, but they stand on the original footprint, making the relationship between evidence and interpretation easy to grasp.
The adjoining museum completes the experience. Postholes, charred wood, pottery, tools, and artifact layers explain how archaeologists moved from excavated traces to the reconstructed village you see outside. That connection is what gives the site its impeccable clarity.
Yoshinogari Historical Park
Best for: fortified community layout
Period: Yayoi period — a large moated settlement tied to the spread of wet-rice agriculture across Japan
What you’ll actually see: reconstructed watchtowers, defensive moats and palisades, raised-floor granaries, and rebuilt elite residences within the walled compound
Don’t miss: the northern inner enclosure, where reconstructed elevated buildings mark what’s believed to have been a ruling or ceremonial precinct
Time needed on-site: half-day
Yoshinogari makes the Yayoi period feel organized, defensive, and highly practical. The moats and watchtowers are not just dramatic set pieces: they show the social shift that came with wet-rice farming, stored surplus grain, and settled land claims.
In addition to the reconstructed buildings, the layout itself is the main feature. Raised-floor granaries, palisades, and separate enclosed zones help explain how farming communities became more complex and more guarded.
Mozu-Furuichi Kofun Group
Best for: monumental tomb landscape
Period: Kofun period — a cluster of keyhole-shaped tombs built for elite and imperial burials, marking the rise of centralized political power
What you’ll actually see: massive moated mounds visible from surrounding paths, designated viewpoints over the largest tombs, and museum exhibits on tomb construction and grave goods
Don’t miss: the viewing platform near Daisen Kofun, believed to be the resting place of Emperor Nintoku, where the scale of the mound is easier to grasp than from ground level
Time needed on-site: half-day
Mozu-Furuichi is not a walk-through ruin, and that is exactly the point. These are active imperial and elite burial sites, so entry to the mounds themselves is not part of the visit. Instead, you experience them from perimeter paths, moat-side viewpoints, and museum displays.
The best strategy is to treat scale as the exhibit. From ground level, the proportions can be hard to read; from designated viewpoints and museum models, the keyhole shape, moats, and monumental planning become much clearer.
Tomizawa Site and Underground Forest Museum
Best for: seeing stratigraphy indoors
Period: Paleolithic — preserved paleoenvironment showing how people and landscape interacted roughly 20,000 years ago
What you’ll actually see: an in-situ excavation floor displayed underground, preserved tree stumps and wetland vegetation, layered soil deposits, and exhibits explaining the ancient forest environment
Don’t miss: the preserved excavation surface itself, kept in place exactly as archaeologists found it, rather than removed and displayed as isolated artifacts
Time needed on-site: 60–90 min
Tomizawa delivers a rare kind of archaeology: an indoor, in-situ excavation surface. “In-situ” means the ground you are looking at is the actual excavated surface, left undisturbed indoors rather than lifted into display cases.
That makes the museum especially valuable for understanding stratigraphy. Soil layers, tree stumps, and plant remains sit where they were buried, giving visitors a direct read on how archaeologists interpret layered evidence without compromise.
How to choose between them:
- Short on time: Tomizawa’s compact indoor layout delivers a focused stratigraphy lesson in under 90 minutes.
- Traveling with kids: Sannai-Maruyama’s walkable reconstructions and hands-on-feeling pit dwellings tend to hold younger attention best.
- Museum-first travelers: Yoshinogari pairs reconstructed structures with strong on-site galleries explaining Yayoi daily life.
- Drawn to monumental landscapes: Mozu-Furuichi’s mound-and-moat views offer the most dramatic sense of scale, best appreciated from designated viewpoints.
Jomon, Yayoi, Kofun, and Early State Sites
Once you understand the flagship sites, the wider archaeological map becomes easier to read. Many places in Japan do not offer intact buildings or dramatic ruins. Instead, they show posthole patterns, stone settings, midden layers, mound silhouettes, and foundation traces.
That does not make them less rewarding. It simply means the experience is more interpretive. The key is knowing what to look for before you arrive.
Jomon Prehistoric Sites in Northern Japan
What to look for on-site: posthole patterns marking pit dwellings, clustered storage pits, shell midden layers in exposed cross-sections, and separate stone alignment zones set apart from the residential footprint
Why it matters archaeologically: the spatial separation between pit dwelling clusters and stone alignments lets archaeologists distinguish daily settlement space from ritual or ceremonial space using stratigraphy and feature mapping
Common misconception to avoid: don’t assume every stone or posthole feature you see is original—many sites mix reconstructed elements with preserved ones, so a labeled posthole grid, a protective covering, or a cutaway stratigraphy panel is usually your clue that you’re looking at an actual preserved trace rather than a rebuild
Best paired with: a site museum showing recovered pottery and tools from the same footprint
Time needed: 1–2 hours
Northern Japan is the strongest region for a deep Jomon focus. The best visits combine open-air layouts with museum galleries, so the settlement plan, pottery, tools, and ritual spaces reinforce each other.
Oyu Stone Circles
What to look for on-site: two large concentric stone rings, radial stone alignments running outward from the centers, and paved or leveled ground marking the ritual precinct
Why it matters archaeologically: walking the perimeter toward the center reveals the concentric planning at a scale that’s hard to grasp from a single vantage point, and on-site signage typically highlights construction episodes and feature clustering rather than asserting fixed dates
Common misconception to avoid: don’t assume “stone circle” means a single isolated ring—look for associated standing stones, paved areas, and burial features nearby, since the term often describes a broader ritual landscape rather than one monument
Best paired with: a site museum explaining excavation phases and recovered ritual objects
Time needed: 45–90 min
Oyu rewards slow movement. Start at the outside, walk the perimeter, and only then move inward. The layout becomes far more legible when you let the geometry reveal itself step by step.
Komakino and Isedotai Stone Circles
What to look for on-site: at Komakino, a tighter, more clearly defined ring with denser stone spacing set against forested rising ground; at Isedotai, a more spread-out arrangement across flatter open terrain, giving each site a distinct visitor-visible geometry
Why it matters archaeologically: comparing stone density and spacing between the two sites helps archaeologists and visitors alike see regional variation in how Jomon communities built ritual landscapes
Common misconception to avoid: don’t assume stone circles are interchangeable or purely “astronomical” by default—layout differences between neighboring sites usually reflect local building choices, not a single shared function
Best paired with: a photographing tip worth remembering—shoot obliquely from a slight rise rather than dead-on to capture the ring’s symmetry and scale in one frame
Time needed: 45–90 min
Komakino and Isedotai work especially well as a comparison pair. Seeing them close together makes one point clear: Jomon ritual landscapes were not built from a single template.
Shell Mounds and Cave Sites
What to look for on-site: exposed cut sections showing layered shell midden deposits, mixed charcoal, bone, and shell fragments visible in profile, and cave mouth areas with marked excavation zones
Why it matters archaeologically: these layered deposits feed directly into archaeobotanical and paleoenvironmental reconstruction, and displays often translate that evidence into species lists, reconstructed diets, and seasonal-use diagrams you can see firsthand
Common misconception to avoid: don’t mistake a shell midden for simple ancient trash—the layering and mixed organic content are read as dated evidence of diet and seasonal occupation, not random debris
Best paired with: a site museum or viewpoint showing exposed profiles behind glass with marked layers
Time needed: 60–90 min
Shell mounds are a perfect example of archaeology hiding in plain sight. What looks modest at first becomes information-rich once you start reading the layers, charcoal, bone, and shell as a dated record of repeated activity.
Yayoi Rice-Farming Settlements
What to look for on-site: raised-floor granary structures, paddy field reconstructions, surrounding moats or palisade lines, and separate cemetery zones
Why it matters archaeologically: each feature maps to a function—raised-floor granary to storage and security, paddy reconstructions to the wet-rice system, moats and palisades to community defense and organization, and cemetery zones to emerging social differentiation
Common misconception to avoid: don’t assume the standing buildings are original—building frames are typically modern reconstructions, while posthole rows and ditch lines underfoot are the actual excavated traces
Best paired with: a reconstructed building zone paired with a nearby museum explaining the excavation
Time needed: 2–3 hours
Yayoi settlements are especially strong for visitors who like cause and effect. Wet-rice farming changed storage, defense, settlement planning, and social hierarchy, and the best sites make those changes visible without requiring specialist knowledge.
Keyhole Tomb Mounds
What to look for on-site: the keyhole outline formed by round and square sections, surrounding moats and terraced slopes, zones where haniwa figures were once placed, and marked approach alignments or viewpoints
Why it matters archaeologically: haniwa placement patterns and mound terracing are studied alongside grave goods to reconstruct social rank and burial ritual
Common misconception to avoid: don’t plan around walking onto or into the mound itself—most major tombs are appreciated from perimeter paths and overlook points, so treat that as the expected way to experience scale rather than a restriction
Best paired with: a nearby museum where stone chamber layouts and grave goods are displayed, since those interior features aren’t accessible on the mound itself
Time needed: 45–90 min
Keyhole tomb mounds are best understood from the outside. That may sound limiting at first, but the perimeter view is part of the experience: mound, moat, terrace, and approach all work together as a designed landscape.
Ancient Capitals and Palace Ruins
What to look for on-site: foundation stones marking former building footprints, gridded street plan traces, reconstructed gates or halls, and drainage or boundary ditch lines
Why it matters archaeologically: foundation spacing and gridded layouts are used to reconstruct administrative precincts and axial planning, visible traits tied to early state phases like the Asuka period and the Heian period
Common misconception to avoid: don’t expect a “capital” ruin to resemble a castle or intact palace—most sites are footprint markers and partial reconstructions rather than standing structures
Best paired with: a reconstructed gate or hall zone paired with a site museum explaining the original layout
Time needed: 2–3 hours
Ancient capitals and palace ruins shift the story from settlement and burial to administration. The remains can be subtle, but foundation spacing and gridded layouts reveal state planning in a direct, elegant way.
Ryukyu Gusuku Sites
What to look for on-site: distinctive curved stone walls, multi-level terracing, and sacred ritual nodes set within the fortified perimeter
Why it matters archaeologically: the combination of defensive walling and embedded ritual space is used to define gusuku as fortified settlement-and-shrine complexes rather than purely military structures
Common misconception to avoid: don’t conflate gusuku with kofun mounds or later Japanese castles—the limestone and coral-stone walling and terracing here are architecturally distinct from the earthen burial mound geometry of kofun and the timber-and-stone construction of castle-era fortifications
Best paired with: a viewpoint overlooking the terraced walls and surrounding landscape
Time needed: 60–90 min
Ryukyu Gusuku Sites add another architectural vocabulary to the trip. Curved walls, terraces, and ritual nodes give them a distinct identity, separate from both Kofun-period tombs and later castle structures.
Archaeological Sites in Tokyo
Tokyo archaeology is different by design. In a dense urban environment, the ground has been built over, excavated, recorded, protected, and often reburied. As a result, the best archaeological sites in Tokyo tend to be subtle: preserved footprints, marked posthole grids, reconstructed elements, and museum displays tied to construction-site discoveries.
This is not a weakness. It is simply a different reading skill. Instead of walking through a vast open-air settlement, you learn to connect site plans, labels, artifacts, and preserved fragments.
Excavation Parks and Preserved Ruins
What counts as a preserved ruin in Tokyo? Look for these signals on the ground:
- Outlined building footprints marked in stone, brick, or paving inserts
- Posthole grids preserved under a shelter or glass covering
- Exposed stratigraphy panels showing cut sections of the cultural layer
- Replicated pit-dwelling outlines set into a park lawn or plaza
- Labeled layers keyed to specific historical periods
- Protective glassed-in features showing an undisturbed excavation surface
- Short reconstructed segments—a wall base, a drainage line—built directly on the original alignment
How to read the ground once you are there:
- Start with the site plan map, usually posted near the entrance, to orient yourself to what is buried where.
- Locate one feature type first, such as a posthole cluster, rather than trying to understand the entire layout at once.
- Match the labels or color coding on the map to specific periods, since many Tokyo sites layer Jomon, Yayoi, and later occupation on top of each other.
- Use elevation changes and ditch lines to infer the original layout even where nothing is visibly reconstructed.
- Cross-check what you traced against any nearby display case, which usually shows artifacts recovered from that exact excavation.
One thing is worth remembering: an excavated feature in Tokyo is often reburied for protection once it has been recorded. The payoff is not always visual drama. Instead, it is the satisfaction of understanding a mapped layout and a preserved cut through the cultural layer.
Museum Collections
A Tokyo museum stop should be chosen by what you want to learn, not only by name recognition.
- Want to see excavated layers and stratigraphy in cross-section? Look for exhibits built around a physical cut section or a scale model of an excavation trench.
- Want to see everyday artifacts—pottery, lithics, tools? Look for galleries organized by object type and period rather than by single findspot.
- Want to see burial goods? Look for cases grouping grave goods together with context on where and how they were recovered.
- Traveling with kids? Look for galleries built around reconstructions and hands-on models rather than case-after-case of small finds.
Label-reading tip box: a few cues separate a genuinely archaeological display from a generic artifact case:
- Provenience or context panels stating exactly where the object was found
- Layer diagrams showing which stratum an object came from
- Notes on the dating method used, such as radiocarbon, typological, or stratigraphic dating
- Reconstruction drawings tied to the actual excavated evidence
- Object findspot maps pinning artifacts to a specific site or trench
This approach keeps the visit practical. You are not only admiring objects; you are learning how those objects fit into a site, a layer, and a wider historical period.
Easy Day Trips from Tokyo
An easy day trip from Tokyo should deliver a larger site footprint than central Tokyo can offer, while still fitting comfortably into one day. The strongest options usually pair outdoor remains with a dedicated site museum or rich on-site interpretation.
Three formats work especially well:
- Option A — big reconstructed settlement experience: best for families or first-timers who want to walk through rebuilt structures and get an intuitive sense of scale.
- Option B — monument landscape / mounds viewpoint experience: best if you want scale and photography, standing at an overlook and taking in earthworks that are hard to appreciate from ground level.
- Option C — museum-first / in-situ display experience: best for a rainy day, since it keeps you mostly under cover while still delivering direct contact with excavated evidence.
The best pairing is simple: spend one day in Tokyo learning how to read labels, cases, and urban traces, then use another day to stand at a larger excavated or reconstructed site. In addition to being efficient, this turns scattered details into a real sense of place.
Famous Japanese Artifacts
Artifacts usually meet visitors indoors. By the time you see them, they have already been lifted out of the ground, stabilized, and placed behind glass. The goal is not only to admire the shape or craftsmanship, but to read the combination of type, period, and context.
That habit changes everything. A display case becomes much more useful when you can connect an object back to a pit dwelling, moat, tomb, layer, or site plan.
Dogu Figurines and Jomon Pottery
Dogu figurines and Jomon pottery are often grouped together as “Jomon art,” but they are not the same thing. One is a modeled figurine; the other is a functional ceramic vessel.
What it is: Jomon pottery is hand-built, fired clay vessels used for cooking, storage, and daily life, while dogu are separately modeled clay figurines, usually humanoid, made for a different purpose entirely.
Period anchor: Both belong to the Jomon period, spanning a long hunter-gatherer era where pottery served practical household needs and dogu are associated with ritual or symbolic activity rather than daily use.
How to recognize it fast: For pottery, look for cord-marked pottery surface texture, the signature Jomon cord-marking technique pressed into wet clay, exaggerated rims and flame-like neck flourishes on more elaborate vessels, and soot blackening or visible repair marks that show a pot’s actual use-life rather than pristine display condition. For dogu, look for stylized, often abstracted human forms with exaggerated features—large eyes, wide hips, or truncated limbs.
What museums usually show alongside it: findspot maps pinning where a piece was recovered, layer diagrams tying it to a specific stratigraphic phase, use-wear notes explaining surface damage, and occasionally reconstruction drawings or touchable replicas.
Misread to avoid: don’t assume dogu had one confirmed purpose—good exhibit text keeps interpretation, such as ritual or identity hypotheses, clearly separated from excavated context, such as where it was found, associated features, and stratigraphic layer.
Bronze Bells and Yayoi Ritual Objects
What it is: the key term to know here is dotaku—bronze bells cast for the Yayoi period, generally understood as ceremonial rather than practical instruments.
Period anchor: Dotaku belong to the Yayoi period and are commonly connected to community-level ceremonies tied to the spread of wet-rice agriculture, though labels tend to stop short of specifying exact ritual steps.
How to recognize it fast: look for a distinctive flattened bell-like silhouette with flared lower edges, raised surface patterning arranged in geometric bands, and suspension loops or handling features at the top that suggest the bell was meant to be hung or carried rather than simply set on a shelf.
What museums usually show alongside it: findspot distribution maps showing where clusters of dotaku have been recovered, hoard notes explaining how multiple bells were sometimes buried together, and excavation photos documenting the burial context.
Misread to avoid: don’t assume dotaku were simple noise-makers for daily signaling—their consistent burial in hoards points toward ceremonial deposition tied to community ritual, not casual utility.
One extra label detail is worth tracking down: casting and production notes. Mold seams or a mention of the casting method used are direct clues to how organized Yayoi bronze-working had become.
Haniwa Figures and Tomb Goods
What it is: haniwa are unglazed clay figures made specifically as funerary markers for Kofun-period burial mounds, not general-purpose art objects.
Period anchor: Haniwa belong to the Kofun period, and the key contextual idea to hold onto is where they sit on a mound—placement in specific zones and rows around the tomb, rather than the object in isolation, is what tells archaeologists about function and rank.
How to recognize it fast: three broad categories are worth learning to spot at a glance—cylindrical forms, or simple tube-shaped bases believed to mark boundaries or rows; human and warrior forms, suggesting status, retinue, or protective roles; and animal or house forms, suggesting symbolic property, livestock, or dwelling representation. Each category hints at a different display purpose without locking in a single confirmed meaning.
What museums usually show alongside it: reconstruction drawings of mound terraces showing placement rows, layer diagrams, and occasionally touchable replicas standing in for the fragile originals.
Misread to avoid: don’t confuse haniwa displayed in a case with the actual internal burial goods—haniwa stood on the mound’s exterior, while items buried inside stone chambers are a separate, generally inaccessible context. Look for reconstructions or diagrams of the stone chamber and interior object placement to understand how the two relate.
Tomb goods follow the same logic. What you see in the display case is accessible and lit for viewing, while the original internal arrangement inside the burial chamber is not something you can usually walk into. Diagrams and cutaway models bridge that gap.
Major Museums and Artifact Displays
Rather than chasing a specific museum by name, judge an artifact museum by exhibit quality. Four questions help immediately:
- Does it include provenance or context panels stating exactly where each object was found, rather than displaying pieces with no findspot information at all?
- Is the collection organized into chronological galleries by period, such as Jomon, Yayoi, and Kofun, so you can track change over time?
- Does it show excavated assemblages—full groups of finds from a single dig—rather than isolating only the most visually impressive “masterpiece” pieces?
- Are there reconstructions or scale models of sites and tombs, giving you a physical sense of the context an object came from?
Beyond that rubric, the best archaeology displays often include:
- Findspot maps pinning objects to an exact location
- Stratigraphic column graphics showing which layer a piece came from
- Pottery typology panels grouping vessels by style and period
- Radiocarbon or other dating-method callouts explaining how an age was determined
- Assemblage grouping by feature, so related finds from the same pit or chamber stay together
- Conservation or restoration notes explaining what is original versus repaired
- Replicas or touch stations letting you handle a stand-in for a fragile original
- Use-wear notes tied to specific pieces, connecting an object back to how it was actually used
The best habit is repeatable at almost any museum: match the artifact to the feature type it came from, such as a pit dwelling, moat, or tomb; then check the layer or phase on the label; finally, locate it on the site plan map if one is available. This turns a case of objects into a direct extension of the ground you already walked.
Practical Itineraries by Region and Trip Length
A strong archaeology itinerary should mix experience types. Open-air ruins, site museums, monument landscapes, and in-situ stratigraphy displays all teach different skills.
It is also smart to build in a weather fallback. If an outdoor stop gets rained out or closes, swap it for an indoor interpretation stop, such as a museum gallery, underground display, or visitor center. The route may bend, but the learning goal stays intact.
Many of the strongest sites sit outside major cities, where reliable mobile signal is not guaranteed. Checking museum hours, loading offline maps between stops, and pulling up site-plan references mid-visit all depend on data access. If you are traveling from outside Japan, setting up an eSIM for Japan travel before departure keeps navigation and reference tools working between remote stops — especially on the Northern Japan and Kansai-Kyushu routes, where transit between sites can involve rural stretches with limited public Wi-Fi.
One-Day and Two-Day Tokyo Routes
1-Day Archaeology Sampler
Best for: first-time visitor with limited time
Route logic:
- Start with an excavation park while you are fresh, since reading subtle ground traces takes more focus than browsing a case.
- Follow with a museum stop so the display cases can explain what you just walked past.
- Keep the day to two stops total to leave room for transit and lingering at labels.
Stops by time block:
- Morning: Visit a preserved-ruin park and use the posted site plan map to trace the footprint before you start walking the grounds.
- Midday: Grab lunch near the site so you are not rushing the transition.
- Afternoon: Head to a nearby archaeology museum and cross-check the artifacts on display against the layer or period labels you saw outdoors.
What you’ll learn to recognize:
- Posthole grids preserved under shelters versus reconstructed elements built on top of them
- Labeled stratigraphy panels keyed to specific historical periods
- How a findspot map in a museum case connects back to a specific excavation trench
If you only do one thing: use the site plan map at the entrance to orient the whole visit before you start walking.
If rain / If short on time: skip the outdoor park and spend the full day in a museum with a physical cut-section or scale model exhibit. You still get the stratigraphy-reading practice without needing dry ground.
2-Day Deep Dive
Best for: visitor wanting artifacts and context to connect, not just repeat Day 1
Route logic:
- Day 1 builds the skill of reading subtle remains on the ground; Day 2 connects artifacts and context back to site plans.
- Save the day trip for Day 2 so you have a full day’s energy for a larger footprint outside the city.
- End Day 2 indoors to consolidate what a full day of walking just showed you.
Stops by time block:
- Day 1 Morning: Excavation park, focused purely on ground-reading skills.
- Day 1 Afternoon: Museum collection stop, matching cases to what you saw outdoors.
- Day 2 Morning: Take an easy day trip out to a larger reconstructed settlement or monument landscape.
- Day 2 Afternoon: Finish at that site’s dedicated museum, using the artifact-to-feature-to-map method to tie the whole two-day arc together.
What you’ll learn to recognize:
- The difference between a fragmentary urban trace and a fuller rural footprint
- How moat lines or mound silhouettes read differently at monument-landscape scale versus a city excavation park
- Assemblage grouping—finds kept together by pit or chamber rather than displayed as isolated pieces
If you only do one thing: on Day 2, compare the outdoor reconstruction to the excavated footprint markers before you go inside to the museum.
If rain / If short on time: replace the Day 2 day trip with a second, different Tokyo museum that emphasizes reconstruction drawings and scale models, preserving the “connect artifact to context” goal without the travel time.
Northern Japan Jomon Route
Best for: deep Jomon focus
Route logic:
- Alternate settlement-scale evidence with ritual and monument landscapes each day so the trip contrasts rather than repeats.
- Place stone circle visits on their own half-days rather than stacking them back to back.
- Close each cluster of stops with a site museum to consolidate what open-air walking only partially explains.
Stops by time block:
- Day 1 Morning: Large-scale settlement site, focusing on posthole clusters and reconstructed dwellings.
- Day 1 Afternoon: Adjoining site museum, reading pottery and tool displays tied to that same footprint.
- Day 2 Morning: First stone circle complex, walked slowly from perimeter inward.
- Day 2 Afternoon: A second, geometrically distinct stone circle for direct comparison.
- Day 3 Morning: Shell midden or cave site, reading exposed cross-sections.
- Day 3 Afternoon: Regional museum consolidating diet, seasonality, and ritual-landscape context from the whole trip.
Field technique: reading a stone-circle plan
- Start at the perimeter and walk it slowly before heading toward the center.
- Look for center or axis cues—radial alignments or paved ground—that hint at how the space was organized.
- Use on-site signage to identify construction phases and feature clusters rather than assuming the whole ring was built at once.
Don’t overplan constraint: resist stacking three or four stone circles into a single day just because they are geographically close. Most of the value comes from slow layout comprehension, so build in time for maps, signage, and viewpoints.
What you’ll learn to recognize:
- Spatial separation between residential clusters and ritual precincts
- Regional variation in stone density and spacing between neighboring circles
- Layered shell midden deposits read as dated seasonal evidence rather than random debris
If you only do one thing: walk a stone circle’s full perimeter before approaching the center, so the concentric planning registers at full scale.
Kansai and Kyushu Archaeology Route
Best for: UNESCO checklisting with context, or tracing how Yayoi settlement life gives way to Kofun monumental power
Route logic:
- Use period, not geography, as the organizing spine: Yayoi settlement archaeology first, then Kofun monument landscapes, then optionally early-state capital ruins.
- Front-load the walkable fortified settlement while energy is high, saving lower-effort perimeter viewpoints for later days.
- Finish each period block with a museum stop so the shift in evidence type gets named and explained.
Stops by time block:
- Day 1 Morning: Fortified Yayoi settlement, walking the moat lines and granary zones.
- Day 1 Afternoon: On-site museum explaining defense, storage, and emerging social differentiation.
- Day 2 Morning: Keyhole tomb mound complex, using perimeter paths and an overlook to read mound geometry.
- Day 2 Afternoon: Nearby museum covering tomb construction and grave-good context.
- Day 3 optional: Ancient capital or palace ruin, tracing foundation stones and gridded street traces.
Period pivot moment: standing at the tomb overlook on Day 2 after having walked a moated settlement on Day 1 is the moment to compare evidence types directly. Yayoi defenses and granaries point to a community organizing around stored surplus and local conflict. The tomb’s approach and moat scale point to a single elite figure commanding labor at a much larger level.
What changes on the ground?
- Community-scale moats and palisades give way to single-monument moats built around one mound.
- Raised-floor granaries disappear, replaced by terraced burial slopes and haniwa placement zones.
- Cemetery zones tied to a whole settlement give way to one dominant burial commanding the landscape.
- Museum context shifts from daily-life tools to grave goods and stone chamber diagrams.
- Approach and viewpoint design becomes deliberate—built to be seen from a distance, not walked through.
What you’ll learn to recognize:
- Moat-and-palisade defense versus single-mound moat monumentality
- Haniwa placement rows around a tomb exterior versus inaccessible interior chamber goods
- Foundation stone spacing used to reconstruct administrative, gridded planning
If you only do one thing: stand at the tomb viewpoint immediately after the settlement visit and consciously name what is different about the evidence.
UNESCO Archaeology Route
Best for: UNESCO checklisting with context, for travelers who want more than a stamp-collecting itinerary
Route logic:
- Pair every UNESCO or UNESCO-adjacent stop with one interpretation-heavy companion the same day, so scale never arrives without explanation.
- Sequence by region to minimize backtracking, but avoid placing two designated sites on the same day without a museum or overlook between them.
- Reserve the least weather-dependent stops, such as museums and visitor centers, for the middle of the trip, when fatigue is highest.
Stops by time block:
- Day 1 Morning: UNESCO-designated mound cluster, using perimeter paths and moat-side viewpoints.
- Day 1 Afternoon: Companion visitor center or museum explaining construction and grave goods.
- Day 3 Morning: A second UNESCO-adjacent settlement or ritual landscape site.
- Day 3 Afternoon: Companion overlook or model room showing the full site plan from above.
- Repeat: follow this morning/afternoon pairing pattern across remaining days depending on trip length, up to 10 days.
UNESCO reality check: designation does not guarantee dramatic ruins at ground level. Many listed sites reward you with landscape scale, exceptional preservation, or unusually good interpretation rather than one jaw-dropping structure.
How to document the visit like an archaeologist, without overcomplicating it:
- Photograph the posted site plan map before you start walking, so you have an orientation reference later.
- Take one wide shot that captures scale—mound, moat, or landscape—rather than a close-up first.
- Take one close shot of a labeled feature or stratigraphy layer, keeping the label in frame for context.
- Note what evidence was excavated versus reconstructed at that stop before you forget which was which.
What you’ll learn to recognize:
- Monument-landscape scale that is only legible from a designated viewpoint
- Interpretation quality as a value marker distinct from ruin drama
- The line between an excavated surface and a modern rebuild, tracked stop by stop
If you only do one thing: pair every single UNESCO stop with its companion interpretation site on the same day. Scale works best with context.
Visitor Comparison
“Best” is not only about fame. For archaeological sites, it is about interpretive clarity: how easily you can look at a mound, posthole grid, stone alignment, or stratigraphy panel and understand what you are seeing.
It also depends on physical effort, travel style, and whether the site pairs in-situ remains with strong indoor explanation. Use this comparison to match the right site type to your trip.
Quick Chooser by Visitor Type
| Visitor type | Best picks (2–4) | Why it works | What you’ll actually do on-site | Watch-outs |
| First-time visitors | Sannai-Maruyama, Yoshinogari | high-clarity reconstructions remove guesswork; postholes displayed next to rebuilds | walk between reconstructed structures and matching evidence panels | skip if you want zero walking |
| Families | Sannai-Maruyama, Yoshinogari | walkable loops with hands-on-feeling reconstructions hold short attention spans | move through pit dwellings and towers, then confirm with a big site model | large open sites can overwhelm very young kids if you try to see everything |
| Museums and artifacts fans | Tomizawa, palace ruins | in situ stratigraphy and findspot-linked displays reward slow reading | study layer diagrams, then cross-check finds against site-plan maps | move quickly if you’re not into label-reading |
| Accessibility-minded travelers | Tomizawa, Mozu-Furuichi | indoor flat viewing or perimeter paths and viewpoints minimize walking load | view stratigraphy under cover or take in scale from a fixed overlook | major tomb mounds are perimeter-only, not enterable |
| Monumental-landscape seekers | Mozu-Furuichi, stone circles | scale is the exhibit itself, best read from designated viewpoints | walk the perimeter or overlook path to register proportion | don’t expect close-up access to the core feature |
Best Sites for First-Time Visitors
Top picks:
- Sannai-Maruyama
- Yoshinogari
- Stone circles, paired with their on-site museum
Why these work:
- Reconstructions are unusually legible, with excavated postholes displayed right beside the rebuilt structure.
- On-site signage separates what was found from what was rebuilt, reducing ambiguity.
- Museum context is close by, so confusion gets resolved quickly.
Ideal visit style:
- Start in the museum model or map gallery before walking the grounds.
- Do one loop to read the overall layout before zooming into single features.
- Pair the outdoor site with its indoor interpretation block so the story locks in while it is fresh.
Avoid this mismatch: don’t expect the same high-clarity reconstruction style at monument-landscape sites like keyhole tomb mounds, where the evidence is scale and silhouette rather than walk-through buildings.
Best Sites for Families
Top picks:
- Sannai-Maruyama
- Yoshinogari
- Reconstructed Yayoi settlement zones
Why these work:
- Visible reconstructions give kids something concrete to look at rather than abstract ground traces.
- Short, well-marked loops keep the walk manageable before attention fades.
- Big maps and models at the entrance give an instant before-and-after comparison without requiring dense label reading.
Family-fit factors:
- Reconstructed pit dwellings or towers kids can walk around, not just view from a path
- Clear reconstruction-versus-excavated-footprint displays
- Short, loop-style routes rather than long linear trails
- Large-scale maps or physical models near the entrance
- Hands-on-feeling structures such as raised storehouses and palisades
Ideal visit style:
- Pick one standout structure, such as the six-pillar tower or a watchtower, as the day’s single highlight.
- Use the model or map first, then let kids match it to what they are walking through.
- Save the museum stop for last, when attention is lower but sitting still is easier.
Avoid this mismatch: don’t plan a family day around a large open-air footprint site expecting constant visual payoff. Big excavated grounds reward a single-highlight approach, not full-site coverage.
Best Sites for Museums and Artifacts
Top picks:
- Tomizawa Site and Underground Forest Museum
- A dedicated site museum attached to any flagship site
- Ancient capitals and palace ruins paired with their site museum
Why these work:
- Objects stay tied to context rather than floating as isolated display pieces.
- Stratigraphy and layer diagrams show exactly where a find sat before it was recovered.
- Site-plan cross-references connect a case of objects back to the excavated footprint you can still walk.
Ideal visit style:
- Read the provenance panel before the object itself, so context comes first.
- Match each display to its layer or phase diagram before moving to the next case.
- Cross-reference the findspot map against the outdoor site plan if you have already walked the grounds.
Museum quality signals, archaeology-specific:
- Provenance or context panels stating exactly where each object was recovered
- Layer or phase diagrams tying a piece to a specific stratigraphic moment
- Site-plan cross-references linking a case to a feature you could walk to outdoors
- Reconstructions or scale models translating the object back into its original setting
Avoid this mismatch: don’t expect every artifact-heavy stop to double as a walkable ruin. Some of the strongest museum-and-artifact pairings, like Tomizawa, are almost entirely indoor by design.
Best Sites for Accessibility
In this guide, “accessibility” means lower walking load, indoor or flat viewing options, and clear signage or visualization. It is not a certified accessibility rating, so plan around these patterns rather than assuming formal accommodations.
Top picks:
- Tomizawa Site and Underground Forest Museum
- Mozu-Furuichi viewpoints
- Any flagship site’s attached museum gallery
Why these work:
- Indoor, flat-floor viewing removes uneven ground from the equation.
- Perimeter paths and fixed viewpoints let you take in scale without covering long distances.
- Strong signage and visualization compensate for terrain you cannot easily cross.
Decision rubric by tier:
- Mostly indoor: Tomizawa’s underground stratigraphy floor delivers a full visit without outdoor walking.
- Mixed indoor/outdoor with short loops: Sannai-Maruyama and Yoshinogari, where reconstructed zones sit close to flat, marked paths.
- Best enjoyed from viewpoints or perimeter: Mozu-Furuichi and stone circles, where the core feature is seen rather than entered.
Ideal visit style:
- Choose the museum gallery first if walking capacity is limited, then decide whether the outdoor loop is worth adding.
- Use designated overlooks instead of trying to approach a mound or ring directly.
- Treat signage and site-plan maps as your primary tool for reading scale you cannot physically cover on foot.
Avoid this mismatch: some archaeology is inherently perimeter-based. Monumental tomb landscapes exist to be read from a distance, not walked through, so get the value from viewpoints and paired museum diagrams.
Cover Image, Top: Ray Swi-hymn, CC BY-SA 2.0, Wikimedia Commons
_____________________________
POPULAR ARCHAEOLOGY ON INSTAGRAM

_____________________________